BUSINESS CHALLENGE
When all the open opportunities that belong to a previous user have to be transferred to a new user, the standard Mass Transfer Records feature supports the transfer of Accounts with related Opportunities but not just the Opportunities.
To overcome this issue we have created a screen flow that lets the users transfer the open Opportunities from an old user to a new user.
STEPS TO ACHIEVE THE REQUIREMENT
- Create Custom Fields (lookup and formula)
- Create a Screen Flow
- Create a List Button
- Add button to the List View
CREATE CUSTOM FIELDS
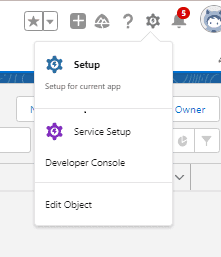
- From the home screen click on the Gear Icon at the top → Go to Setup.
-
Select Object Manager → In the Quick find search and select Opportunity.
-
Select Fields and Relationships → Click New.
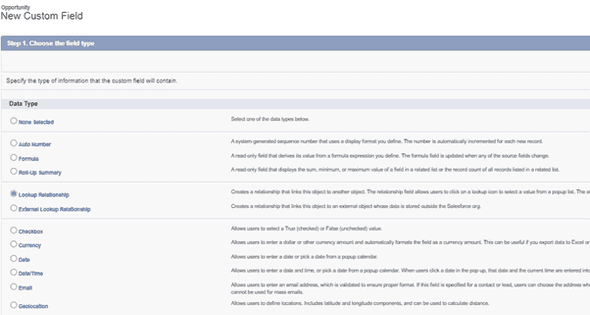
- Select Lookup Relationship → Click Next.
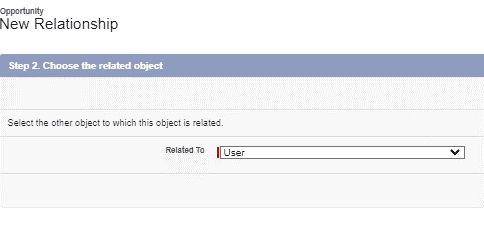
- For Related to Option Select User as the Object → Click Next.
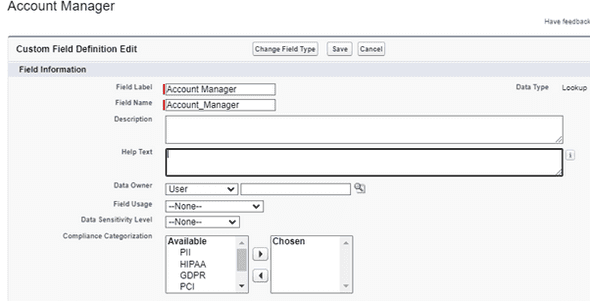
- Enter Account Manager as the field label → Field Name(API Name) will be populated automatically.
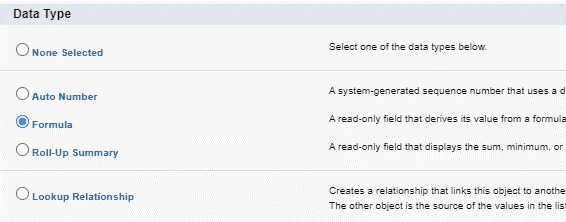
- Create a Custom field, select Formula as the data type → Click Next.

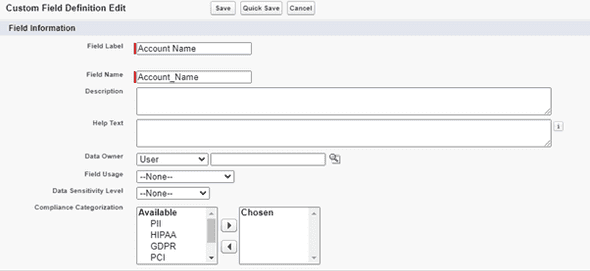
- Select Text as Data Type and Enter Field Label as Account Name and the Field Name(API Name) will be Auto populated → Click Next.
- The following formula returns the Account Name in the formula field → Account.Name. Insert the required fields using the Insert Field button.

-
Click Next.
-
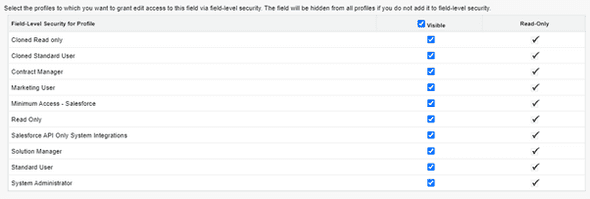
Select the Profiles which you want to grant access to.
-
Add the field to the Page Layout → Click Save.
-
Create custom field , select Formula as Data Type → Click Next.
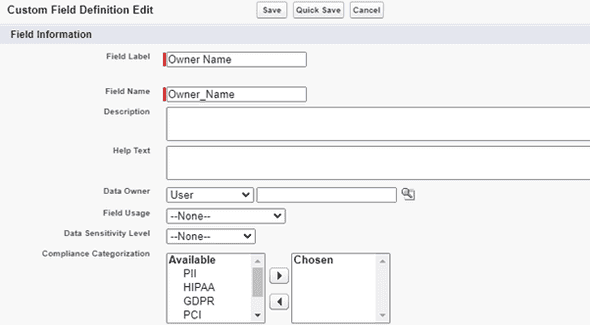
- Select Text as Data Type and Enter Field Label as Owner Name and the Field Name(API Name) will be Auto populated → Click Next.
- The below formula returns the Owner Name by combining the first name and last name.
- Click Next.
CREATE SCREEN FLOW
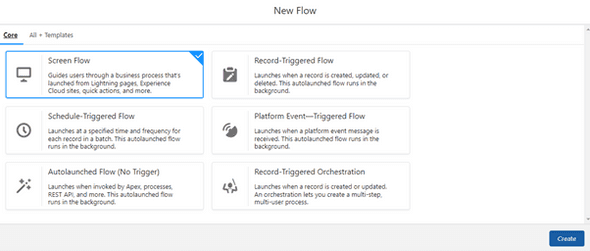
- From the Quick find search and select Flows → Click New Flow.
- Select Screen flow → Click Create.
-
By default the layout is set to Auto Layout.
-
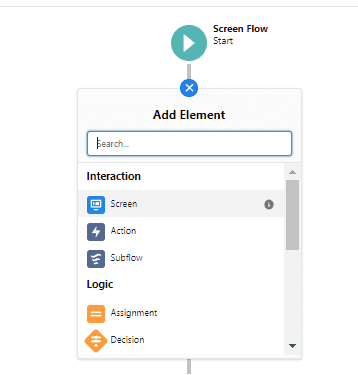
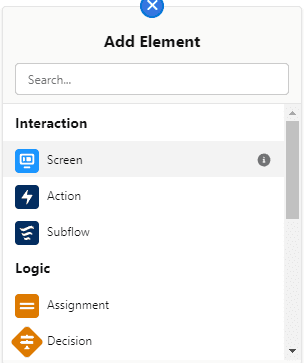
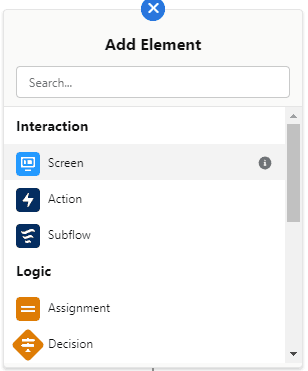
Select (+) icon → Select Screen Element.
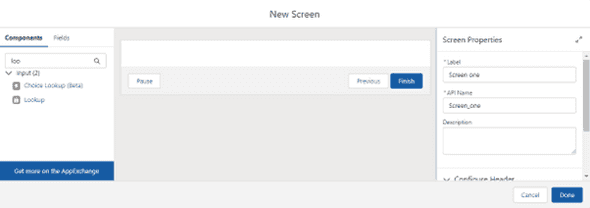
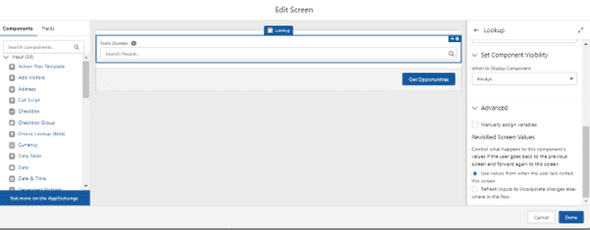
- Drag and Drop Lookup Component onto the screen
-
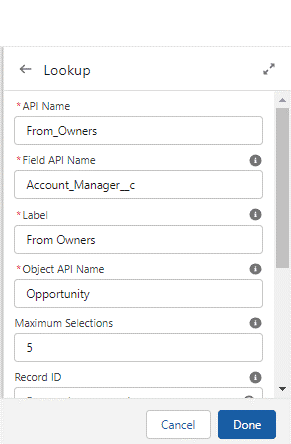
Enter API Name as From_Owners and enter Field API Name as Account_Manager__c (any lookup fields API Name to the User object).
-
Enter Label as From Owners and select Object API Name as Opportunity → Enter maximum selections 5.
- Click Advanced → Check Use values from when the user last visited this Screen.
-
Name the Screen Element as Screen One → uncheck Show Header.
-
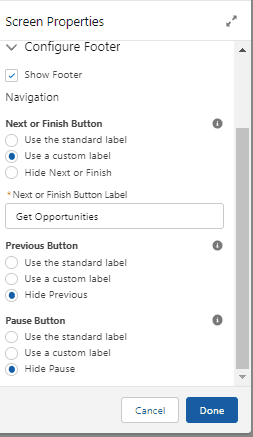
Under Configure footer Choose Use a Custom Label in Next (or) Finish Button → Enter Get Opportunities.
-
Hide Previous button and Pause button in the footer.
-
Select (+) icon →Select Get Records element.
-
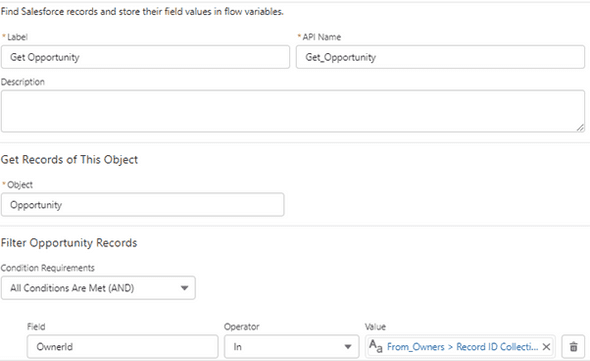
Enter Get Opportunity as the Label. Select Object as Opportunity → Choose All Conditions Are Met (AND) for the condition requirements.
-
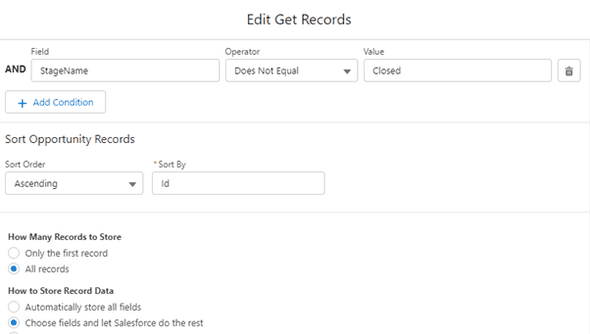
For the first condition choose OwnerId as the Field ,In as the Operator and From_Owners > RecordId Collection as the value→ Add another condition as Stage Name Does Not Equal Closed.
-
Under Sort Opportunity Records choose Ascending as the sort order and sort by Id.
-
Choose All Records for How many records to Store, select Choose fields and let salesforce do the rest for How to Store Record Data.
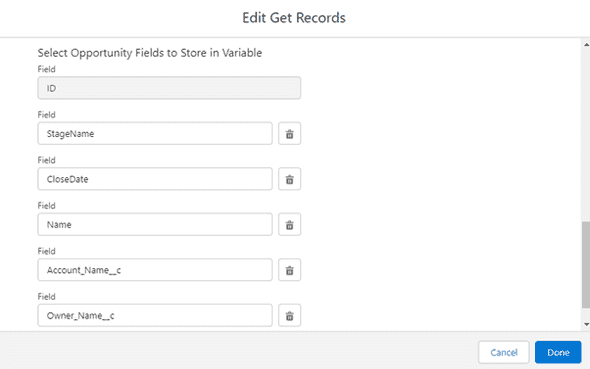
- For Select Opportunity Fields to store in Variable add Stage Name, Close Date, Name, Account Name, Owner Name and click Done.
- Click (+) icon → Select Assignment Element.
-
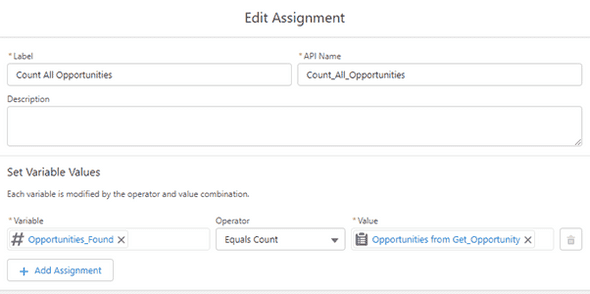
Enter Count All Opportunity as the Label. Under Set Variable Values, Click on Variable and Click New Resource.
-
Select Variable as Data Type → Enter Opportunities_found as API Name → Select Number as Data Type → Enter 0 in Decimal Places → Click Done → Select Equals Count as the Operator → Set Opportunities from Get_Opportunity as Value → Click Done.
- Select (+) icon → Select Screen Element.

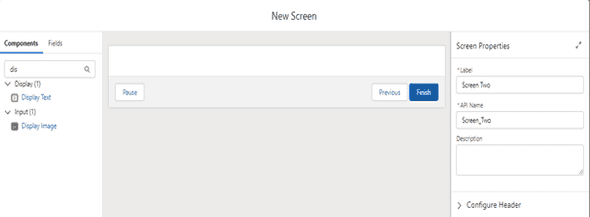
- Name the Screen Element as Screen_Two → uncheck Show Header.
-
Under Configure footer choose Use the standard label for Next or Finish button and Previous button → hide the pause button.
-
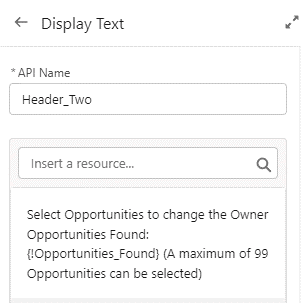
Drag and Drop Display Text Component onto the screen.
-
Enter API Name as Header_Two → Insert Select Opportunities to change the Owner Opportunities Found: {!Opportunities_found} ( A maximum of 99 Opportunities can be selected) in Resource.
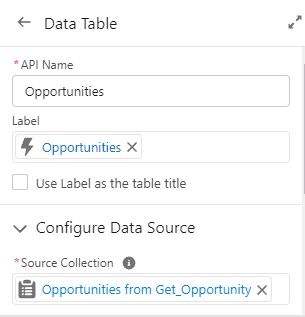
- Drag and Drop Data Table Component onto the screen.
-
Enter Label as Opportunities and API Name will be Auto populated
-
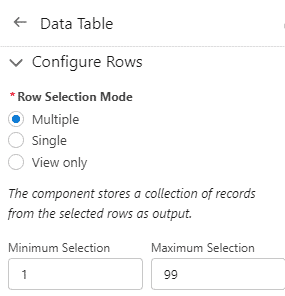
Click Configure Data Source → Select Opportunities from Get_Opportunities as Source Collection → Click on Configure Rows → Select Multiple Selection Mode → Enter 1 in Minimum Selection and Enter 99 in Maximum Selection
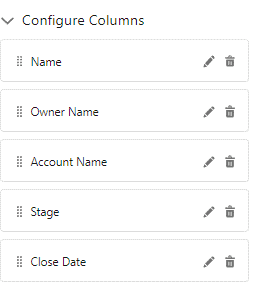
30.Click Configure Columns and Select the fields Name, Owner Name, Account Name, Stage and Close Date.
- Click Advanced → Check Use values from when the user last visited this screen → click Done.

- Click (+) icon , Select Screen Element.
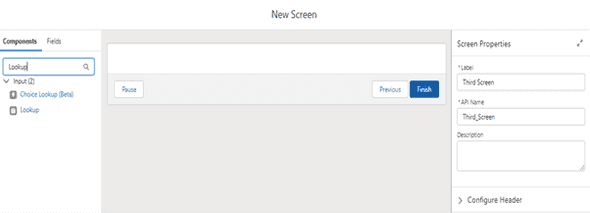
- Enter Label as Third_Screen and API Name will be auto populated → uncheck show Header.
-
Drag and Drop the Lookup Component onto the Screen.
-
Enter API Name as To_Owner and Field API Name as Account_Manager__c and Label as To Owner → Enter Object API Name as Opportunity.
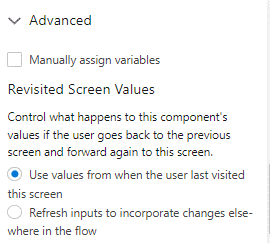
- Click Advanced → Check Use values from when the user last visited this Screen.
-
Under Configure Footer → Check Use the standard label for Next or Finish button and Previous button → Hide Pause button → Click Done.
-
Select (+) icon ,Click the Assignment Element.
-
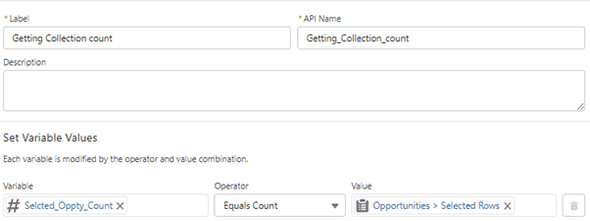
Enter Label as Getting Collection Count. Under set Variable Values, Click on Variable and Click New Resource.
-
Select Variable as Data Type → Enter Selected_Oppty_Count as API Name → Select Number as Data Type → Enter Decimal Value as 0 → Click Done → Select Equal Count as Operator and Value as Opportunities > Selected Rows → Click Done.
-
Select (+) icon, Click the Screen Element.
-
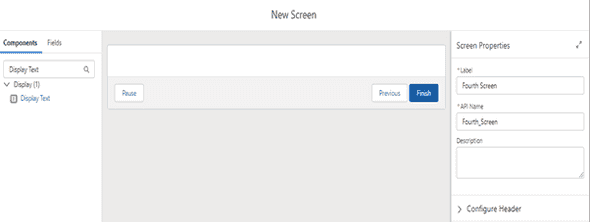
Enter Label as Fourth Screen and API Name will be auto populated → Check off show Header
-
Drag and Display Display Text Component onto the screen.
-
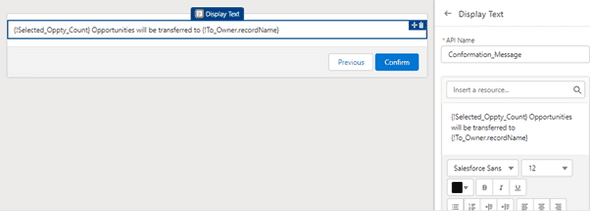
Enter API Name as Conformation_Message → Insert {!Selected_Oppty_Count} Opportunities will be transferred to {!To_Owner.recordName}.
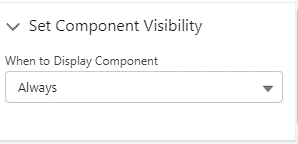
- Select Set Component Visibility → Choose Always.

-
Under Configure footer → Choose Use a Custom Label → Add Confirm to the Next or Finish button label → Check Use the standard label for Previous button and Hide Pause button → Click Done.
-
Click (+) icon, Select Loop Element.
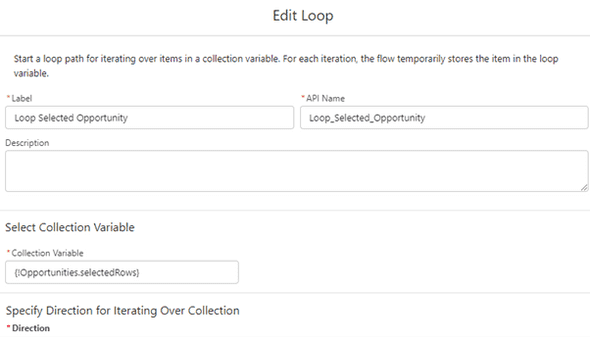
- Label the Loop as Loop Selected Opportunity and API Name will be auto populated → Under select Collection Variable → Enter {!Opportunities.SelectedRows} → Check First item to Last item → Click Done.
-
Click (+) icon, Select the Assignment Element
-
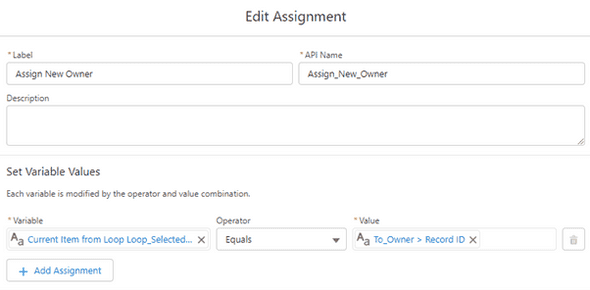
Enter Label as Assign New Owner → Under Set Variable Values → Select Variable as {!Loop_Selected_Opportunity.OwnerId}, Select Equals as the Operator and Value as To_Owner>Record ID → Click Done.
-
Click (+) icon, Select the Update Record Element.
-
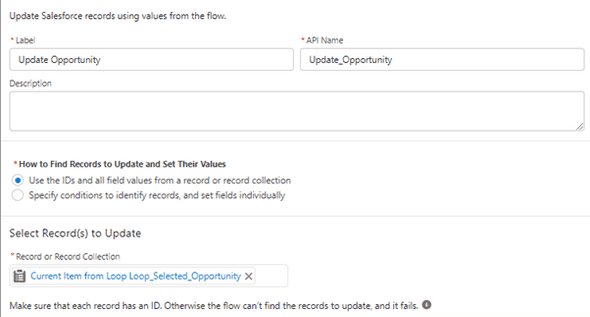
Enter Label as Update Opportunity → Select Use the IDs and all field values from a record or record collection → Under Select Record(s) to Update → Select the Record Collection as Current Item from Loop Loop_Selected_Opportunity → Click Done.
-
Click (+) icon, Select the Assignment Element.
-
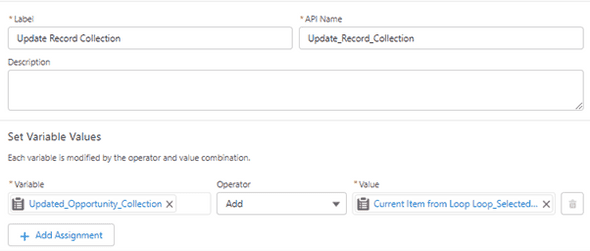
Enter Label as Updated Record Collection → Under Set Variable Values, Click on Variable and Click New Resource.
-
Select Variable as Data Type → Enter Updated_Opportunity_Collection as API Name → Select Record as Data Type → To make it Collection, Check the Allow multiple values checkbox → Select Object as Opportunity → Click Done.
-
Select Add as Operator and Values as Current Item from Loop {!Loop_Selected_Opportunity} → Click Done.
-
Click (+) icon, Select the Assignment Element.
-
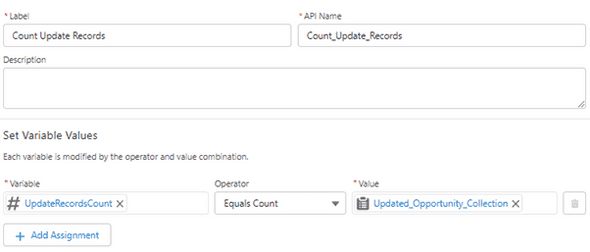
Enter Label as Count Updated Records → API Name will be Auto populated.
-
Under Set Variable Values, Select Variable, Click New Resource → Select Variable as Data Type → Enter API Name as Updated_Records_Count and Select Number as Data Type → Set the Decimal Places as 0 → Click Done.
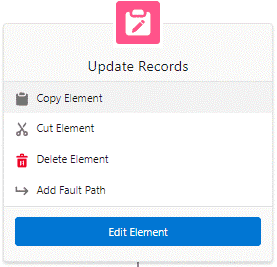
- Click on the Update Records, Select Add Fault Path.
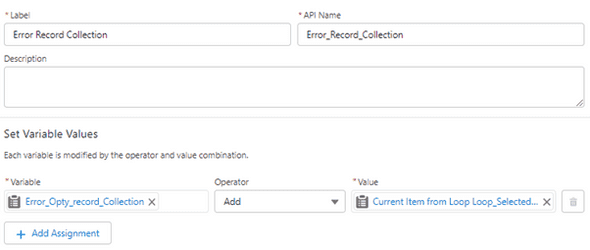
- Click (+) Icon on the Fault Path, Select the Assignment Element → Enter Label as Error Record Collection.
-
Under Set Variable Values, Click Variable , Click New Resource → Select Variable as Data Type → Enter API Name as Error_Opty_record_Collection.
-
Enter Record as Data Type → To make it a Collection, Check the Allow multiple values checkbox → Select Object as Opportunity → Click Done.
-
Select Add as Operator and Values as {!Loop_Selected_Opportunity} → Click Done.
-
Click (+) icon, select the Assignment Element.
-
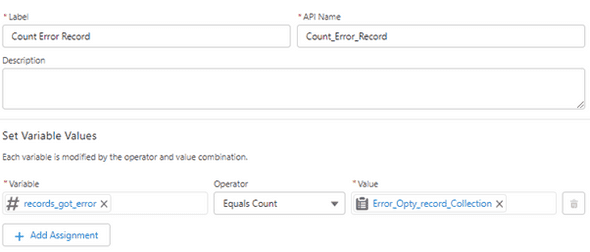
Enter Label as Count Error Record → Under Set Variable Values → Click Variable → Select New Resource → Select Variable as Data Type → Enter API Name as records_with_error, Select Number as Data Type → Set Decimal Values as 0 → Click Done.
-
Select Equals Count as Operator and Values as {!Error_Opty_record_Collection} → Click Done.
-
Click (+) icon, Select the Assignment Element.
-
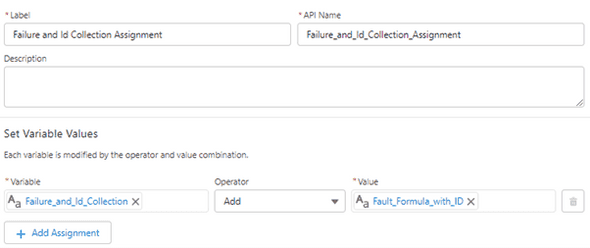
Enter Label as Failure and Id Collection Assignment → Under Set Variable Values → Click Variable → Select New Resource → Select Variable as Data Type → Enter API Name as Failure_and_Id_Collection → Select Text as Data Type → To make it a Collection, Check the Allow multiple values Checkbox → Click Done. Select Add as operator and value as Fault Formula With ID.
-
Click (+) icon, Select Connect to Element and Click on the Loop Element.
-
Click (+) icon, Select Decision Element.
-
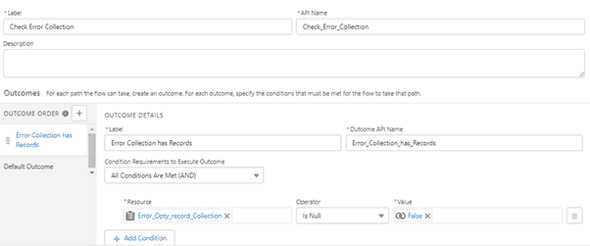
Enter Label as Check Error Collection and API Name will be Auto Populated → Under Outcome details → Enter Label as Error Collection has Records → Select All Conditions Are Met (AND).
-
Select New Resource → Select Variable as Data Type → Enter API Name as Error_Opty_record_Collection → Select Data Type as Record and To make it a Collection, Check the Allow multiple Values Checkbox → Select Object as Opportunity → Click Done.
-
Select Is Null as Operator and Select Values as Global Constant False → Click Done.
-
Click (+) icon in the Error Collection Records path, Select Screen Element.
-
Enter Screen Label as Fifth Screen with error and API Name will be auto populated → uncheck Show Header.
- Drag and Drop the Display Text Component onto the Screen.
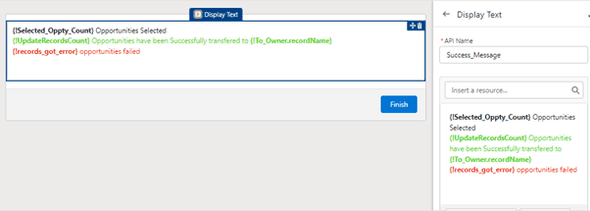
- Enter API Name as Success_Message and Insert {Selected_Oppty_Count} “Opportunities Selected {!Updated_Records_Count} Opportunities have been successfully transferred to {!To_Owner.record Name} {!records_got_error} Opportunities failed” as Resource → Click Set Component Visibility → Choose Always.

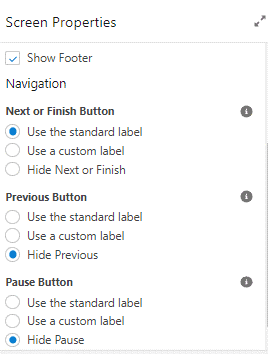
- Under Configure Footer → Check Use the Standard Label for Next or Finish button and Hide Previous and Pause button → Click Done.
-
Click (+) icon, Select Screen Element.
-
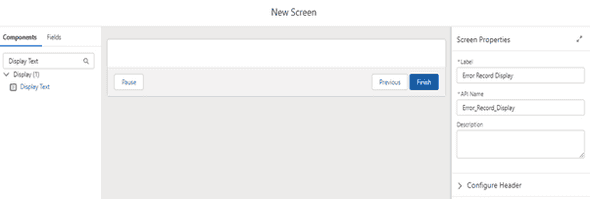
Enter Screen Label as Error Record Display and uncheck Show Header.
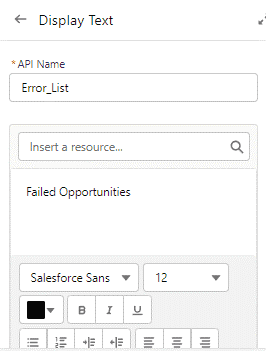
- Drag and Drop the Display Text Component onto the screen → Enter API Name as Error_List → Insert a resources as Failed Opportunities→ Click Set Component Visibility→ Choose Always.
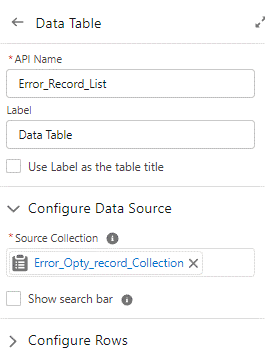
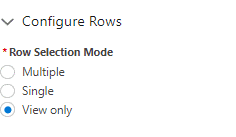
- Drag and Drop the Data Table Component onto the Screen → Enter API Name as error_record_list and Label as Data Table → Under Configure Data Source→ Select {!Error_Opty_record_Collection} as Source Collection → Click on Configure Rows → Select View Only.
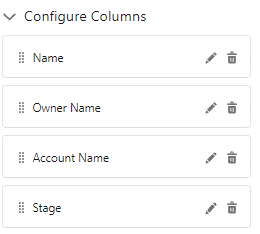
- Click Configure Columns and Select Fields Name, Owner Name, Account Name, Stage → Click Set Component Visibility→ Select Always.
-
Click Advanced → Check Use Values from when the user last visited this Screen.
-
Under Configure Footer → Check Use the Custom Label for Next or Finish button as Show Errors and Check Use the Standard Label for Previous button and Hide for Pause button.
-
Click (+) icon, Select Screen Element.
-
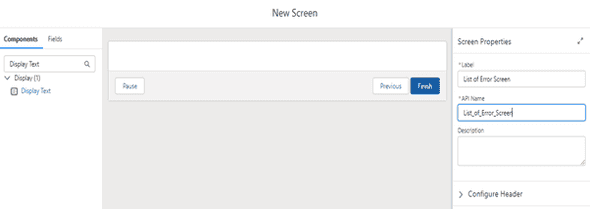
Enter Screen Label as List_of_Error_Screen and Check Off Show Header.
-
Drag and Drop the Display Text Component onto the Screen
-
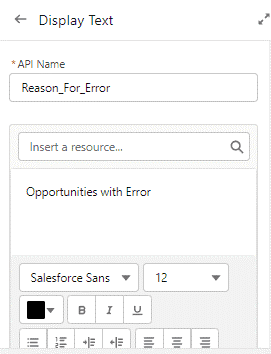
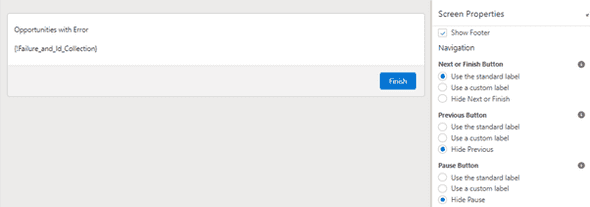
Enter API Name as Reason_for_Error and Insert Opportunities with Error as Resource → Drag and Drop the Display Text Component onto the Screen.
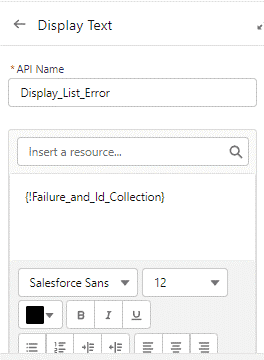
- Enter API Name as Display_List_error and Insert {!Failure_and_Id_Collection} as Resource → Click Set Component Visibility→ Select Always.
- Under Configure Footer → Check Use the Standard Label for Next or Finish button and Hide Previous and Pause button → Click Done.
-
In Default Outcome Path ,Click(+) icon, Select Screen Element.
-
Enter Screen Label as Fifth Screen Without error and API Name will be auto populated →uncheck Show Header.
-
Drag and Drop the Display Text Component onto the Screen.
-
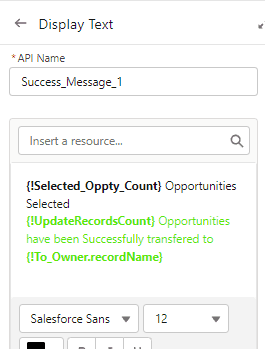
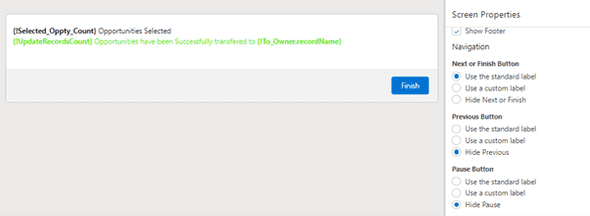
Enter API Name as Success_Message 1 and Insert {!Selected_Oppty_Count} Opportunities Selected {!Updated_Records_Count} Opportunities have been Successfully transferred to {!To_Owner.recordName}.
- Click Set Component Visibility → Select Always.
- Under Configure Footer → Check Use the Standard Label for Next or Finish button and Hide Previous and Pause button → Click Done.
CREATE A LIST BUTTON
-
Select Object Manager → In the Quick find search and select Opportunity.
-
Select Buttons, Links and Actions → Click New Buttons or Links.
-
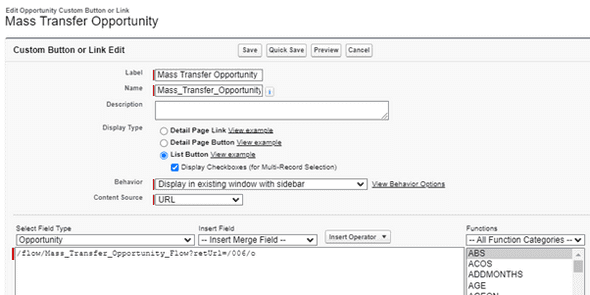
Enter Label as Mass Transfer Opportunity and Name will be auto populated
-
Select List Button as Display Type → Check Display Checkboxes→ Select Behaviour as Display in Existing window with sidebar and Select URL as Content Source.
-
Copy and Paste the flow URL and add a return URL. /flow/Mass_Transfer_Opportunity_Flow?retUrl=/006/o → Click Save.
Here /006/o returns the user to the recently viewed opportunities list view once the flow has finished.
ADD BUTTON TO THE LIST VIEW
- Select Object Manager → In the Quick find search and select Opportunity.
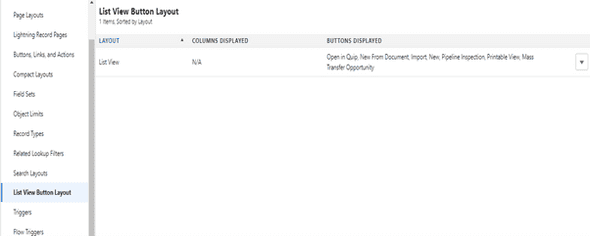
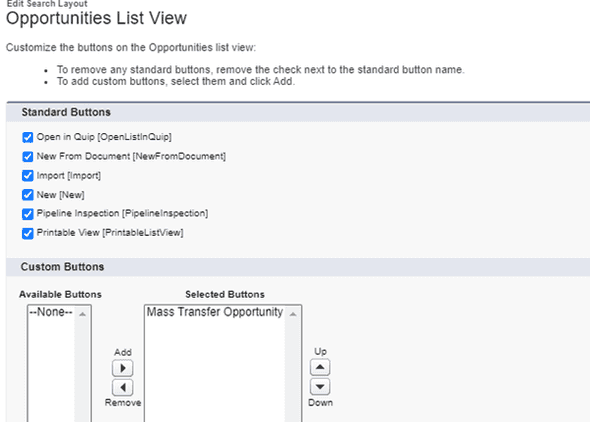
- Select List View Button Layout → In Custom Button Click Mass Transfer Opportunity in Available Button and Add it to Selected Buttons → Click Save.
TESTING
Go to the Opportunities tab and click the button Mass Transfer Opportunity . choose a user in the From Owner, click Get Opportunities, Select the Opportunity Records and then transfer the records to the new user to whom you want to transfer. You will be able to see the failed records if there are any.
WRAPPING IT UP
In this blog we have covered how to mass transfer Opportunity records from one user to another user using a screen flow.










Leave a Comment