BUSINESS CHALLENGE
Whenever an opportunity is submitted for unanimous Approval, opportunity will get approved only when all the approvers review and approve the opportunity. In order to expedite the process, opportunity owners can conduct meetings with all approvers and get oral approval. Then opportunity owners can submit for approval by expecting all the approval steps to be auto approved.
We can have a quick action button which invokes a screen flow which in turn uses an Apex class to perform auto approval.
STEPS TO ACHIEVE THE REQUIREMENT
- Create an Apex class
- Clone existing Approval Process to add steps
- Create a Screen Flow
- Create a Quick Action button
- Add button to the page
- Control Button visibility
CREATE AN APEX CLASS
-
Create an Apex class and name it as OpportunityAutoApproval and paste the following code. It submits the record for Approval and approves all the steps automatically except the last approval i.e., of the Opportunity Owner.
public class OpportunityAutoApproval { @InvocableMethod public static void submitAndApprove(List<Id> opportunityIds){ Id opportunityId = opportunityIds.get(0); Approval.ProcessSubmitRequest request = new Approval.ProcessSubmitRequest(); request.setComments('Submitted for Approval'); request.setObjectId(opportunityId); Approval.ProcessResult result = Approval.process(request); approveRecord(opportunityId); } private static void approveRecord(Id opportunityId){ Opportunity opp = [Select Id, Name, OwnerId from Opportunity where Id = :opportunityId]; List<ProcessInstanceWorkitem> workitems = getWorkitems(opportunityId); While (workitems.size() > 0){ List<Approval.ProcessWorkitemRequest> requestList = new List<Approval.ProcessWorkitemRequest>(); for (ProcessInstanceWorkitem piwi : workitems){ if (piwi.OriginalActorId != opp.OwnerId){ Approval.ProcessWorkitemRequest request = new Approval.ProcessWorkitemRequest(); request.setWorkitemId(piwi.Id); request.setComments('Approved the Record'); request.setAction('Approve'); requestList.add(request); } } if (requestList.size() > 0){ Approval.process(requestList); workitems = getWorkitems(opportunityId); }else { break; } } } private static List<ProcessInstanceWorkitem> getWorkitems(Id targetObjectId){ List<ProcessInstanceWorkitem> workitems = new List<ProcessInstanceWorkitem>(); for (ProcessInstanceWorkitem pIwi : [Select p.Id, p.OriginalActorId from ProcessInstanceWorkitem p where p.ProcessInstance.TargetObjectId =: targetObjectId]){ workitems.add(pIwi); } return workitems; } } -
@Invocable annotation is used for the apex method in order to invoke the apex method from the screen flow.
CLONE EXISTING APPROVAL PROCESS TO ADD STEPS
- In Order to learn how to create an Approval Process please visit Approval Process in Salesforce.
- You can either create an Approval Process or clone an existing one and edit the steps as per the requirement.
- The Apex class we created above approves all the approvals until the assigned approvers Id is the equal to the Id of the Opportunity Owner.
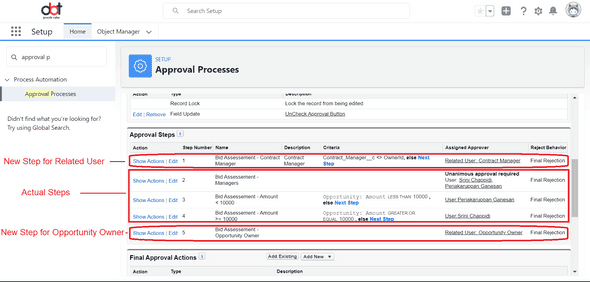
- If the Opportunity Owner is among any of the related users the Apex code will stop approving the approvals. In order to overcome this we create additional steps at the beginning.
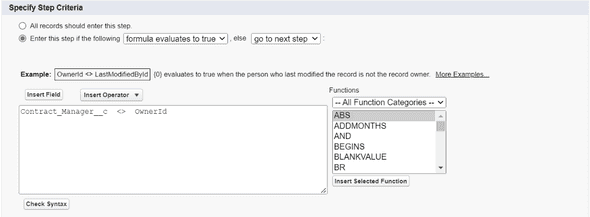
- The number of steps we add at the beginning will be equal to the number of related users for the Opportunity and the entry criteria to enter the step is the related users Id should not be equal to the Opportunity Owner Id.
- Then we add a step at the end where the assigned approver will be the Opportunity Owner and the entry criteria will be All the records should enter this step.
- Make sure the criteria for every step is either All records should enter the step or if it is Enter the step if the following, the else condition should be go to next step because we don’t want to approve or reject the record until the last step.
- Activate the Approval Process.
CREATE A SCREEN FLOW
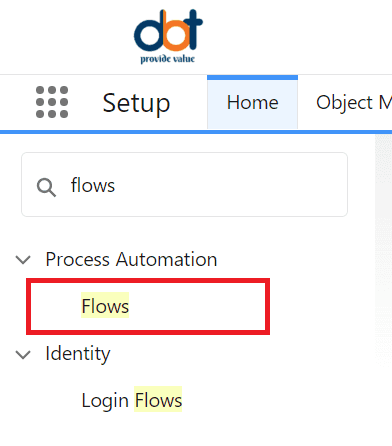
- Go to Setup, search and select Flows.
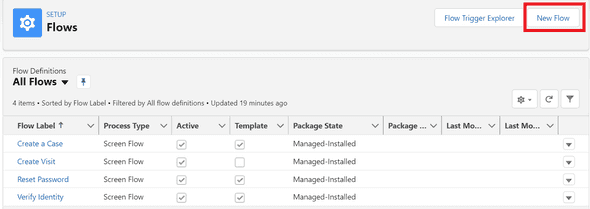
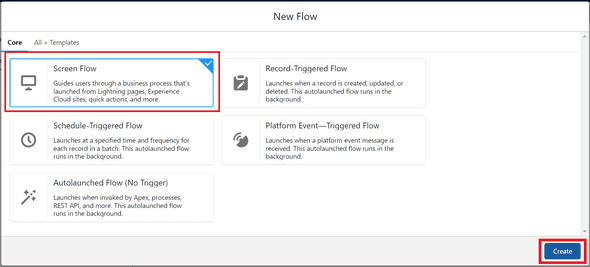
- Click New Flow.
- Choose Screen Flow and click Create
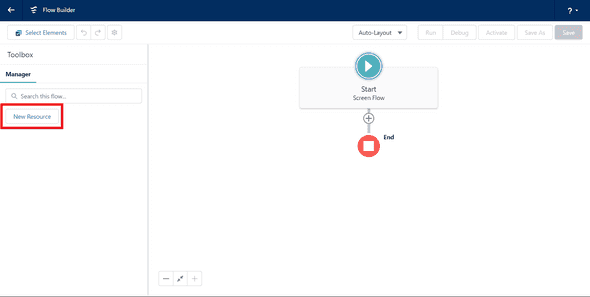
- Click on New Resource.
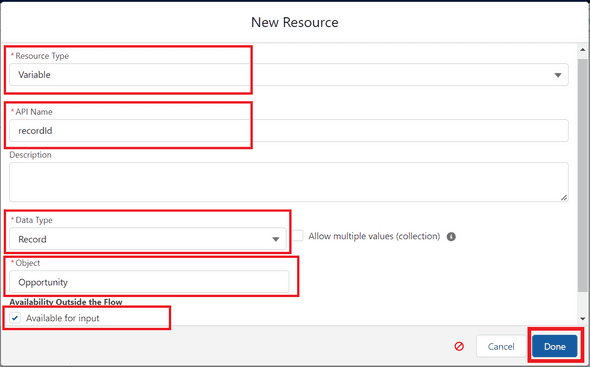
- Select Variable as Resource Type, recordId as the API Name, Record as Data Type, Opportunity as Object and Check the option Available for input to fetch the record Id from the screen.
- Click Done.
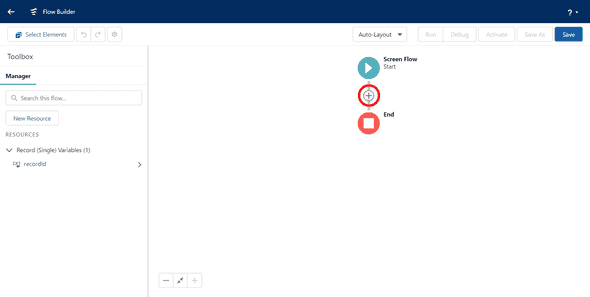
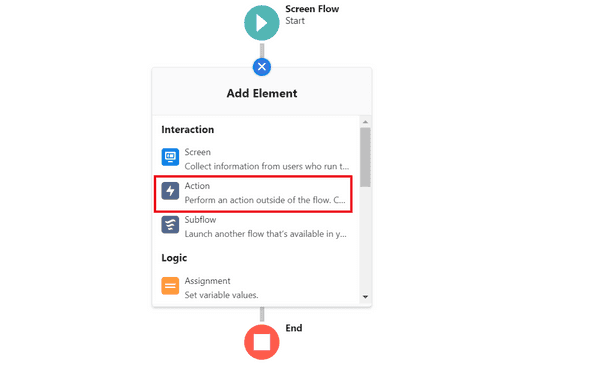
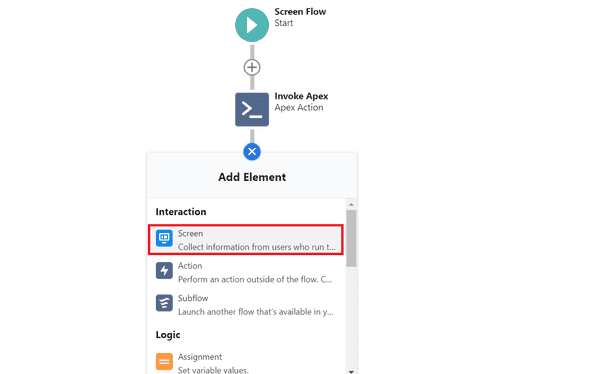
- Click on + as shown below.
- Choose the Action element.
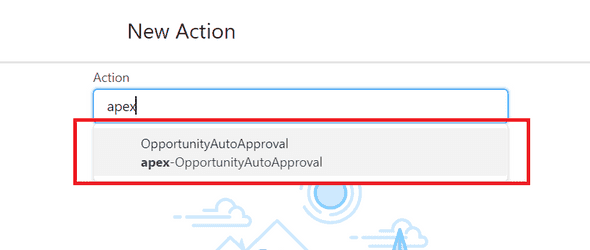
- In the Search all Actions box, type apex and select the apex method that we previously annotated with @Invocable annotation.
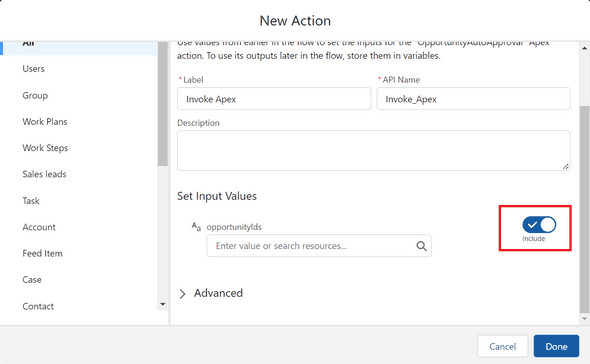
- Enter the Label as Invoke Apex and under Set Input Values switch the toggle to include Opportunity Ids.
- For the Opportunity Ids, Select the Opportunity Id from the resource variable that we have created.
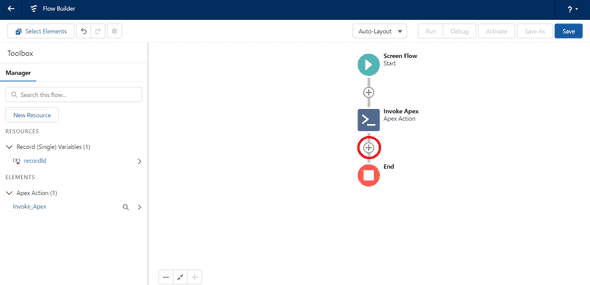
- Click + below the Invoke apex element.
- Select screen element.
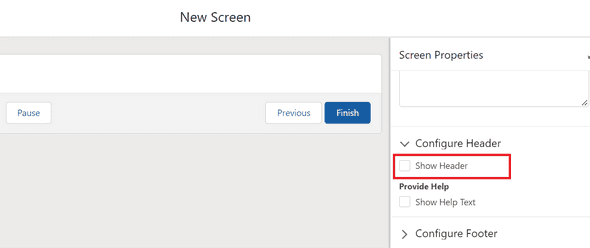
- Enter the Label as End Screen. Under Configure Header Uncheck Show Header checkbox.
- Under Configure footer hide Previous and Pause buttons. Use a Custom Label for the Finish button and name it as Close.
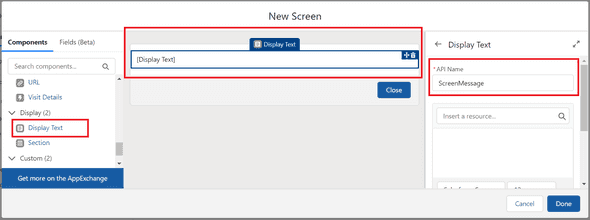
- From the Components tab on the left scroll down, drag and drop the Display Text component onto the screen.
- Enter the API Name as ScreenMessage.
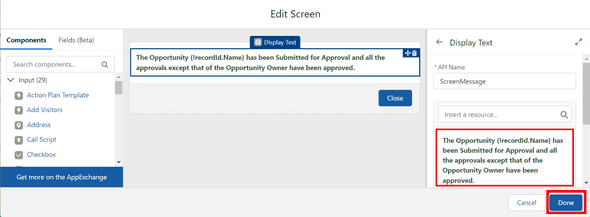
- Enter the required message under the Insert a resource search box. Use the Insert a resource to display any fields of the record in the text to be displayed.
- Click Done.
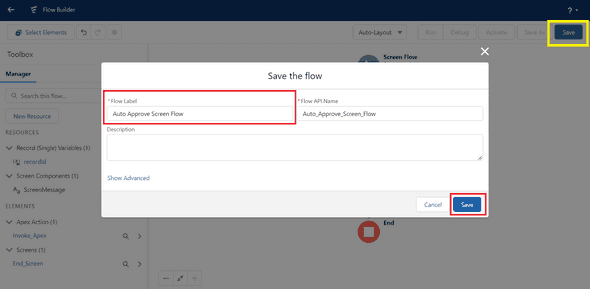
- Click Save at the top right corner. Enter Flow Label and then Click Save on the pop up.
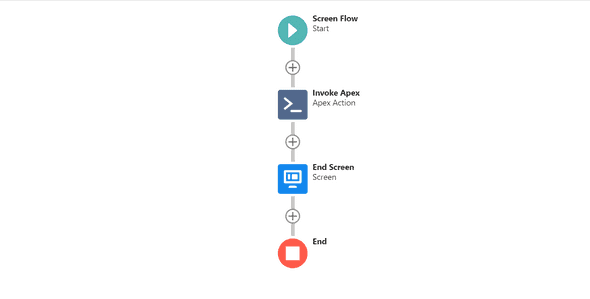
- This is how the final Flow looks like
CREATE AN ACTION BUTTON
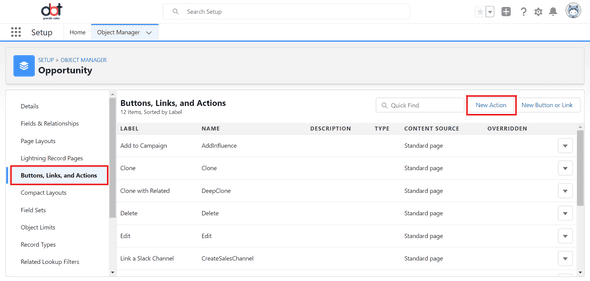
- Go to Object Manager and select Opportunity.
- Select Buttons, Links and Actions. Click New Action.
-
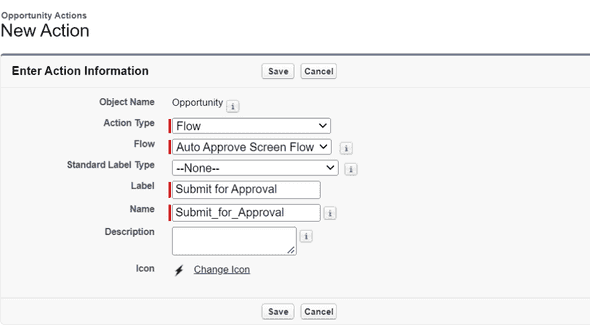
For the Action Type choose Flow, choose the previously created screen flow i.e. Auto Approve Screen Flow as the Flow, Enter the label as Submit for Approval.
-
Click Save.
ADD BUTTON TO THE PAGE
- Go to any Opportunity record page. Click the gear icon at the top of the page and select the Edit Page.
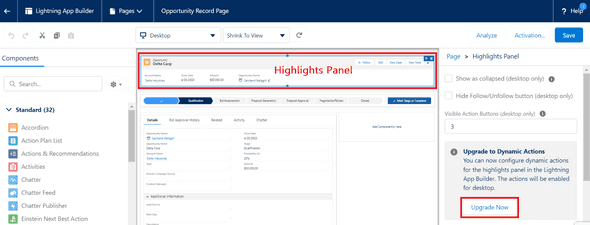
- Click on the Highlights Panel at the top. If you don’t see the action buttons on the right pane of the page, Upgrade to Dynamic Actions by clicking on Upgrade Now.
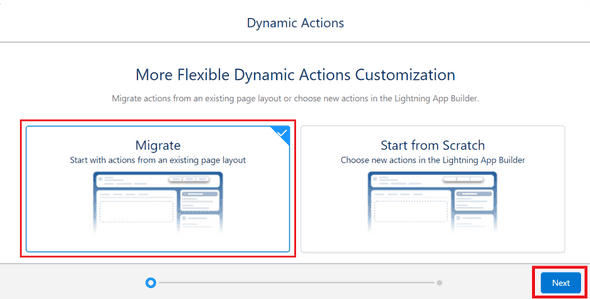
- Choose the Migrate option and click Next.
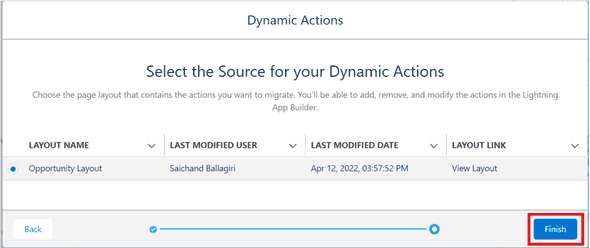
- Choose the page layout that contains the actions you want to migrate and click Finish.
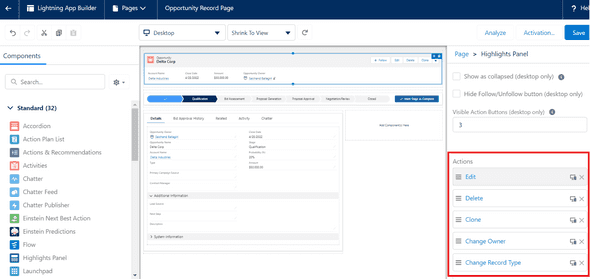
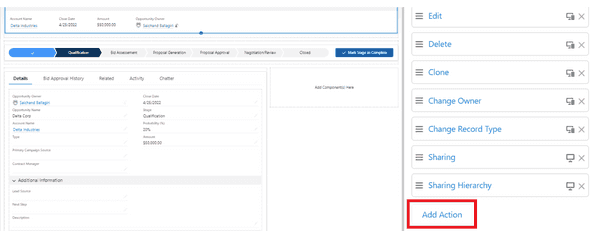
- Now you will see the Actions on the right.
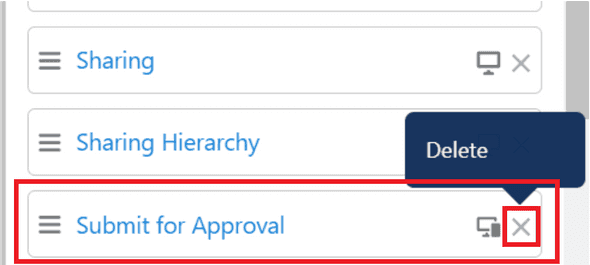
- Remove the standard Submit for Approval Button.
- Scroll down on the actions and you will see the Add Action button.
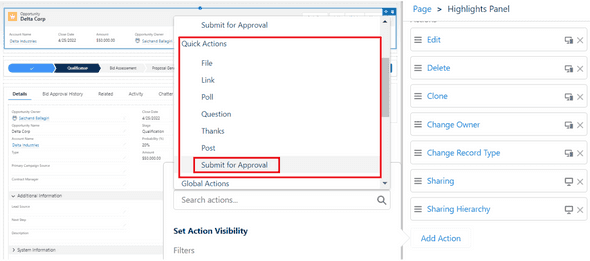
- Click on Add Action and you will see a pop up to search. Choose an action from a list of actions which includes Standard, Global and Quick actions. From Quick actions choose the Submit for Approval Quick action that we created.
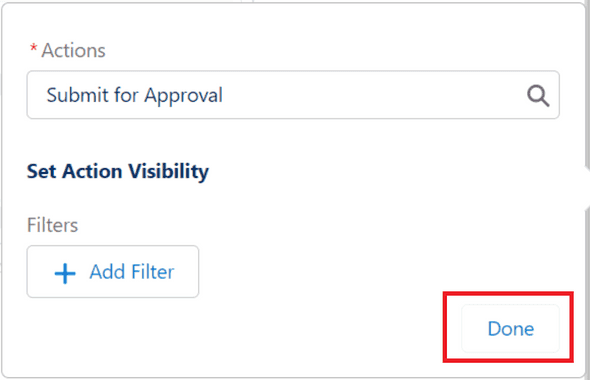
- Click Done.
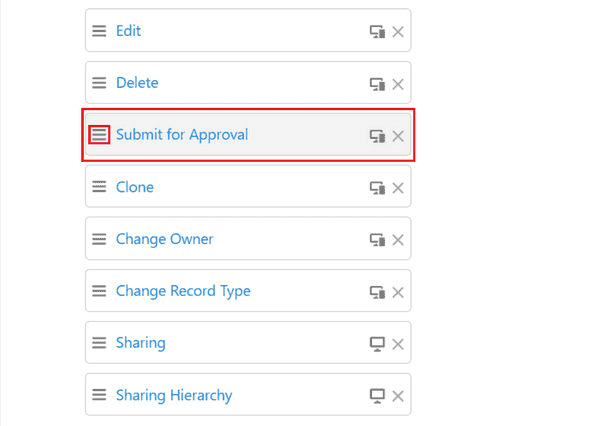
- Move the actions position to the top using the hamburger icon which is on the left of each action button.
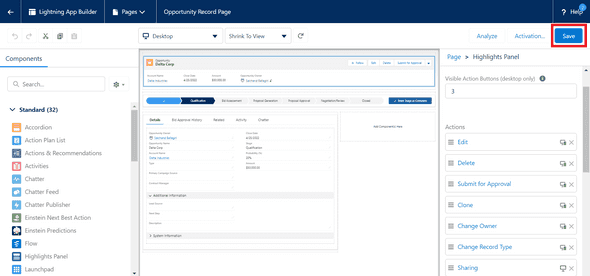
- Click Save at the top right corner.
- Now go back to any Opportunity record page and you will be able to see the Submit for Approval button after edit and delete buttons.
CONTROL BUTTON VISIBILITY
- From the apps home page, click the gear icon at the top and go to Setup.
- Go to the Object Manager.
- Search and select Opportunity.
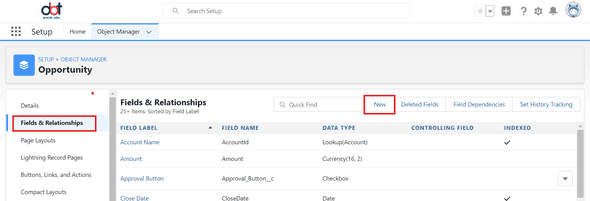
- Go to Fields and Relationships and click New.
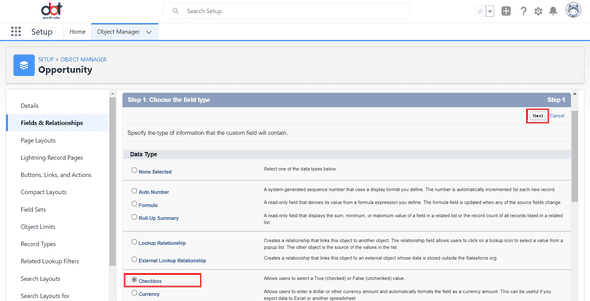
- Choose the checkbox as data type and click Next.
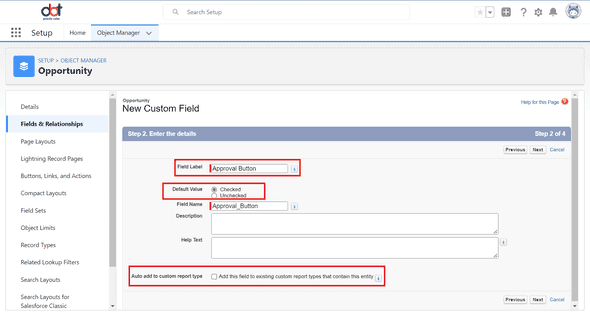
- Label the field as Approval Button and set the default value as Checked. Uncheck the option Auto Add to Custom Report Type because we use this field only to control the button visibility.
- Click Next.
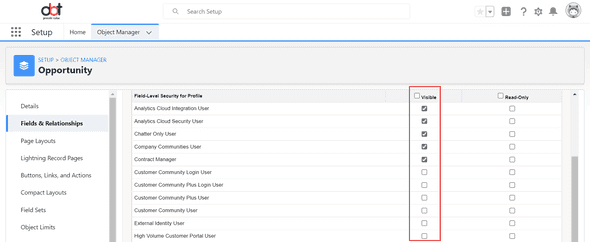
- Grant access to the required profiles using the visible checkboxes and click Next.
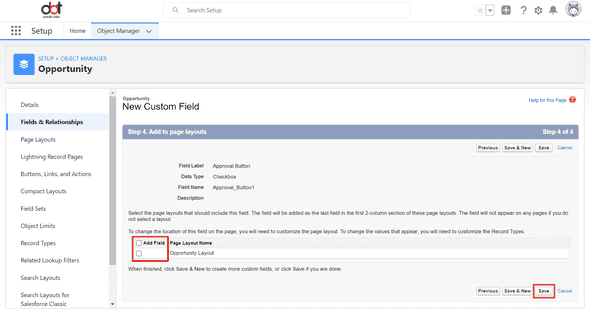
- Uncheck the option Add Field because this field is only used to control button visibility and is not required on the page layout. Click Save.
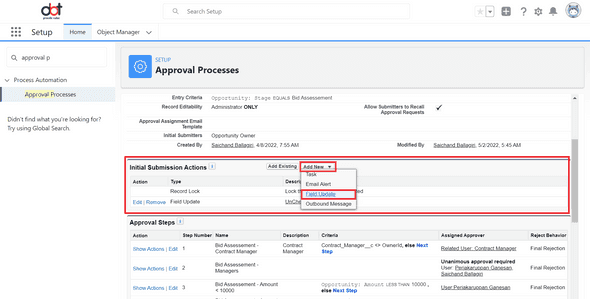
- Now go back to the Approval Process. Every Approval Process has Initial Submission actions before the Approval Steps and Final Approver Actions, Final Rejection actions, Recall Actions after the Approval Steps.
- In the Initial Submission actions section click Add New and select Field Update.
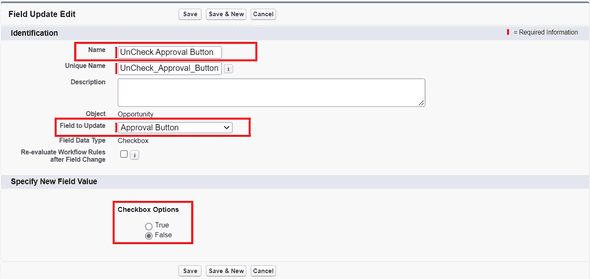
- Name it as Uncheck Approval Button, choose the Field to Update as Approval Button and Specify New Field Value as False.
- Click Save.
- Similarly create field update actions for Final Approval Actions, Final Rejection Actions, Recall Actions and update the Approval Button fields value to Checked.
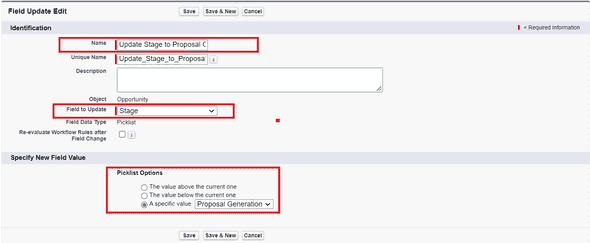
- Create another Field Update Action for Final Approval Actions and update the Stage so that the Opportunity moves to the next stage after Approval. In our case we update the stage to Proposal Generation.
-
Now go to any Opportunity record page and click the gear icon at the top and click Edit Page.
-
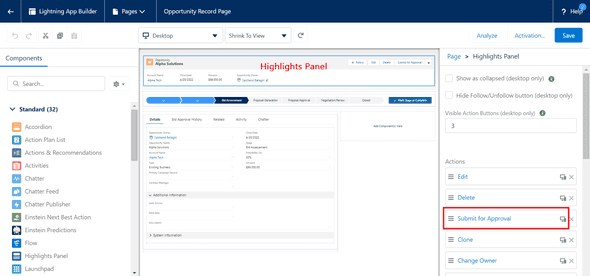
Now click on the Highlights Panel and under actions select the Submit for Approval Button.
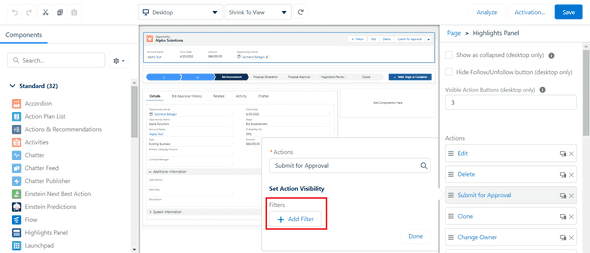
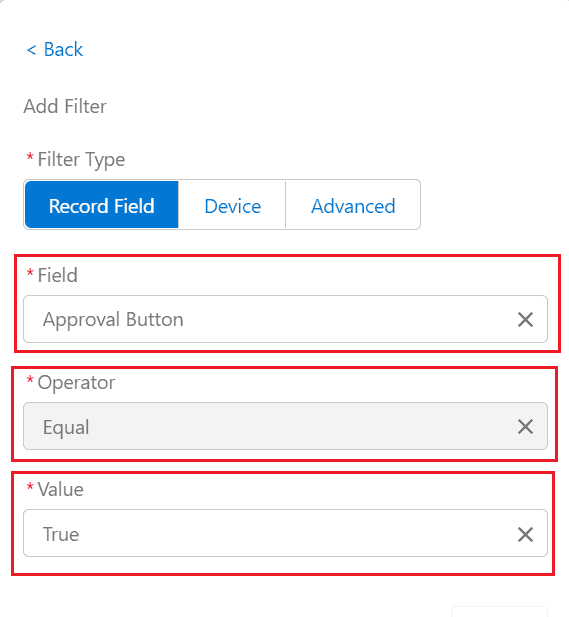
- You will see a popup and click on Add Filter.
- Choose Approval Button as Field, Equal as operator and True as value.
- Click Done.
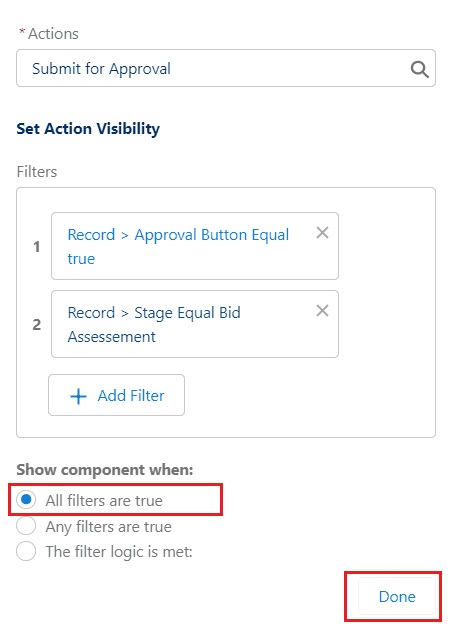
- Click Add Filter Again and choose Stage as Field, Equal as operator and Bid Assessment as value. Click Done.
- Let the Option be All Conditions are true for Show Component When option and Click Done.
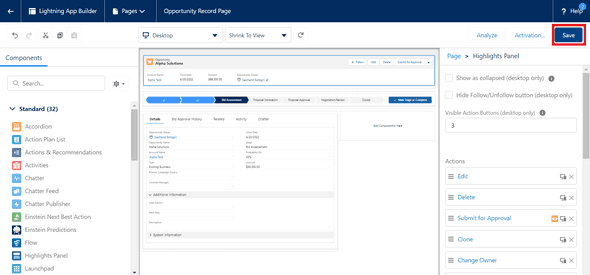
- Click Save at the top right corner on the page.
- Now head back to any Opportunity record page and you will see the button only in Bid Assessment Stage and it will not be displayed after submitting for Approval.
WRAPPING IT UP
In this blog we have discussed how to create an action button using a screen flow to process the Auto Approval for an Opportunity and also how to display the button dynamically.








Leave a Comment