BUSINESS REQUIREMENT
In order to protect the data from accidental deletion, any record deletion (opportunity, lead, account etc..) requires an approval from manager or all stakeholders before deletion.
With this blog, you will learn how to achieve the above requirement by creating a screen flow to trigger an approval process and a record trigger flow to delete an Opportunity record after approval.
STEPS FOR DELETE APPROVAL
- Create a Custom Field
- Create Approval Process
- Create Screen Flow
- Create Custom Quick Action Button
- Create a Record Triggered Flow
CREATE A CUSTOM FIELD
-
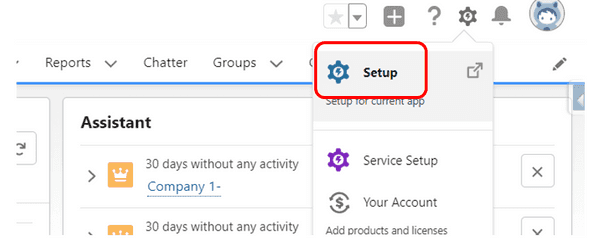
From the home page click on Gear Icon at the top, go to Setup.
-
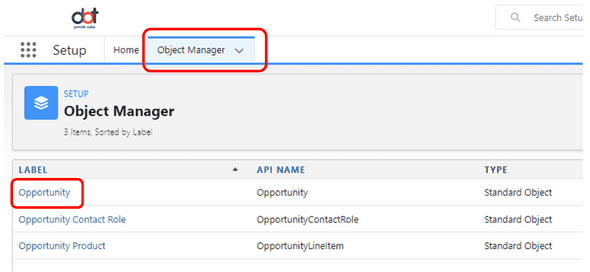
Select Object Manager → In the Quick Find, Search & Select Opportunity.
-
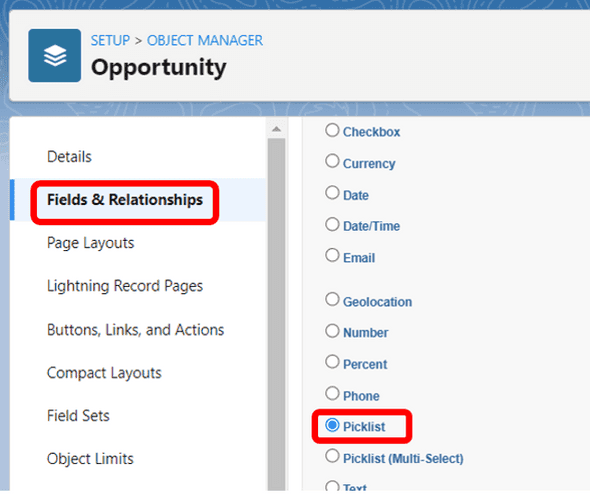
Select Fields and Relationship → Click New → Choose Pick List Data Type → Click Next.
Picklist help to hold multiple values.
-
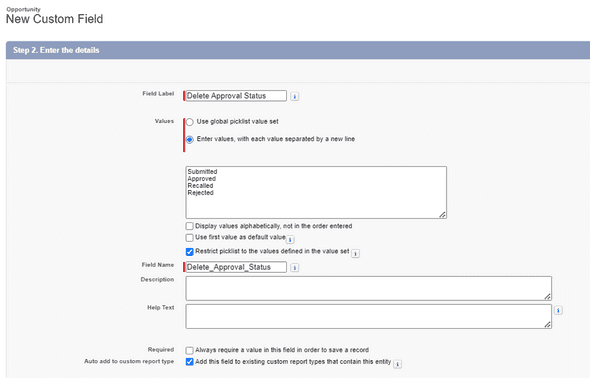
Label the Field as “Delete Approval Status” and Enter the below mentioned values each in a new line.
-
Click Next.
-
Select the Profiles to which you want to grant visibility access → Click Next.
-
“Delete Approval Status” field is used in order to trigger the flow and for quick action button visibility. We do not want to add this field in the Page layout. Uncheck the box as mentioned in the screenshot.
Click Save.
Create Approval Process
-
In Order to learn how to create an Approval Process please visit Approval Process in Salesforce.
-
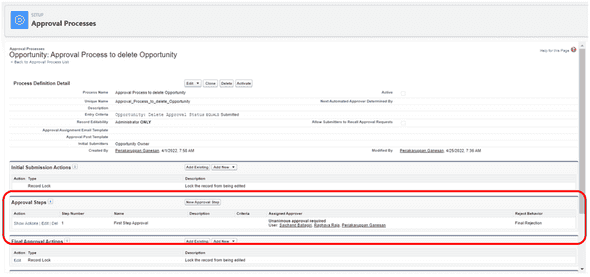
We created an Approval Process where the entry criteria is Delete Approval Status equals Submitted and added one step where three users should unanimously approve in order to delete the record.
-
The below screenshot shows how our Approval Process looks like. You can add multiple steps if required.
-
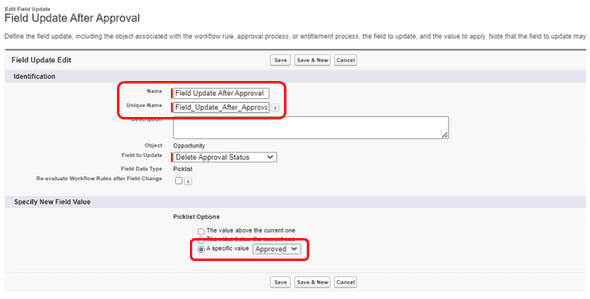
Add Field update action in Final Approval Action. This update action will trigger the record trigger flow to delete the record. Click Add New → Select Field Update.
-
Enter Field Update Name as Field Update After Approval. Select Delete Approval Status field in Field to Update. For Specify New Field Value, under Picklist Options choose “A Specific value” and select “Approved” from the dropdown (Please refer the below image).
-
Click Save.
-
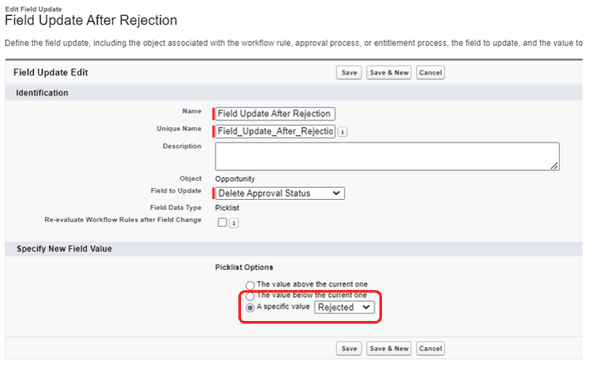
Similarly, create field updates for Final Rejection Actions. For Picklist value select Rejected as the Value.
-
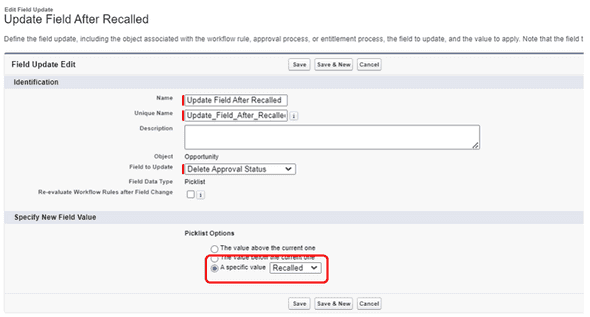
Similarly, create field updates for Recall Actions. Choose Recalled as the picklist Value.
-
Now Activate the Approval Process.
Create Screen Flow
-
If you are in the Approval Process Screen Click Home → In Quick Find Box search for Flows and select it→ Click New Flow Button at the top right corner.
-
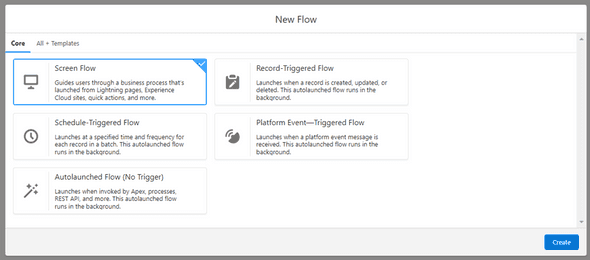
Select Screen flow → Click Create.
-
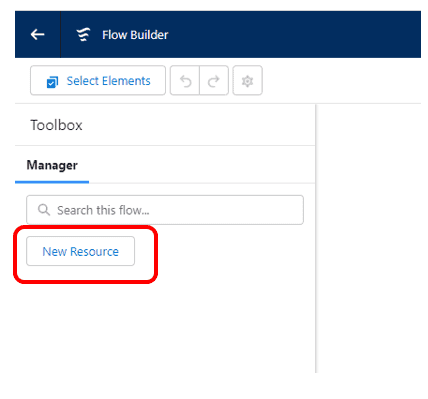
Click New Resource.
-
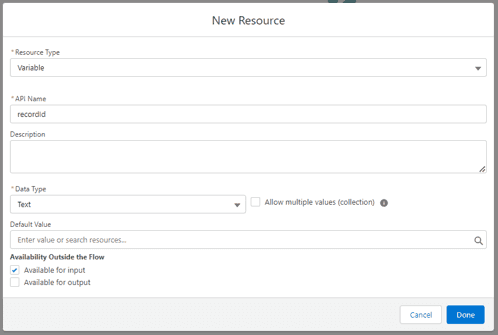
Select Variable as Resource Type → Text as Data Type → Enter recordId as API Name → Check on Available for Input → Click Done.
-
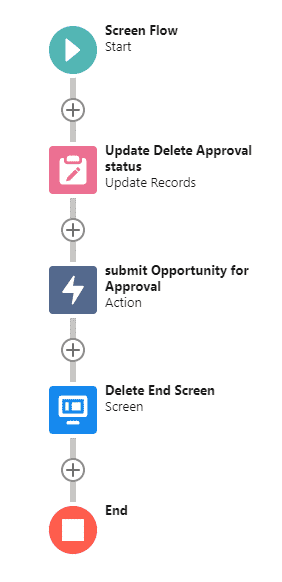
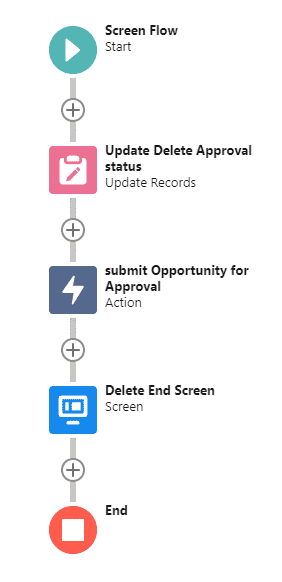
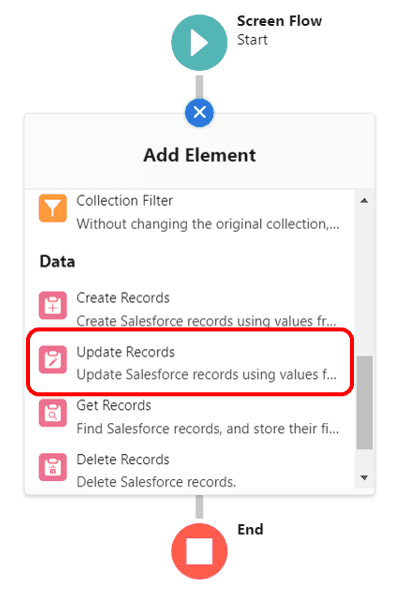
Click (+) Icon → Select Update Element.
-
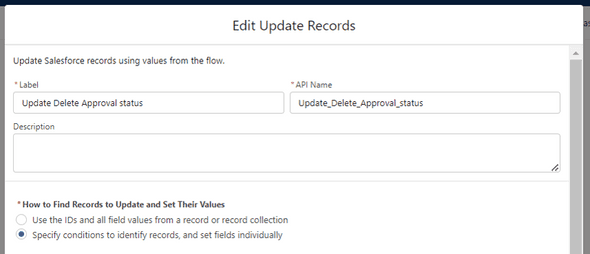
Label the Update element name as “Update Delete Approval status” →Under How to find records to update and set their values Select Specify Conditions to Identify records and set fields individually option.
-
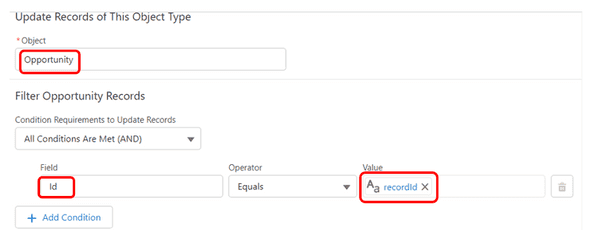
For the Object choose Opportunity → for condition requirements to update records under the Filter Opportunity Records choose All Conditions Are Met(AND) → choose Opportunity Id Equals to recordId.
-
Under set field values for the Opportunity Records, Choose the field as Delete Approval Status and for the value select Submitted.
-
Click Done.
-
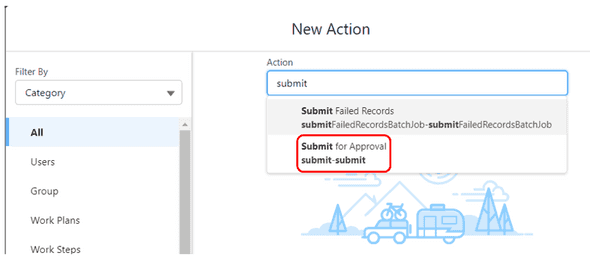
Add the Action Element into the Flow → Enter Submit in the search box → It will display the Approval Process action → Select “Submit for Approval”.
-
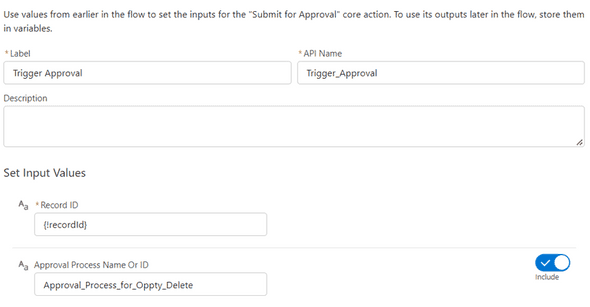
Name the action element as “Trigger Approval”. Under Set Input variables, for the Record ID choose the recordId variable and for Approval Process Name or ID use the API name of the Approval Process i.e. Approval_Process_to_delete_Opportunity.
-
Click Done.
-
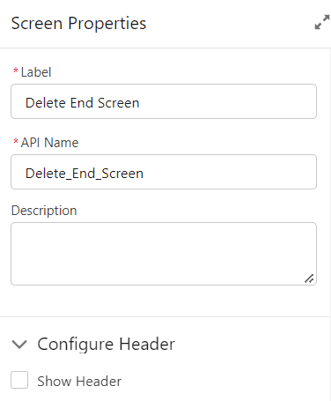
Then Add Screen Element. Name the Screen Element as Delete End Screen. Under Configure Header uncheck the Show Header option.
-
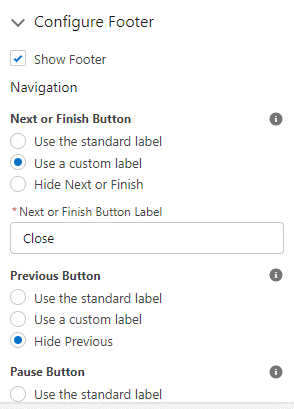
Hide the Previous and Pause buttons. For the Next or Finish Button, choose Use a custom label and enter the label as “Close”.
-
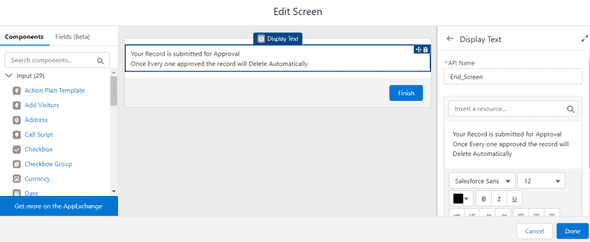
Drag Display Text component onto the screen from the left components pane . Label it as “End Screen” and add Content inside. Here we added “Your record is submitted for approval, once everyone approves, the record will be deleted automatically”.
-
Click Done.
-
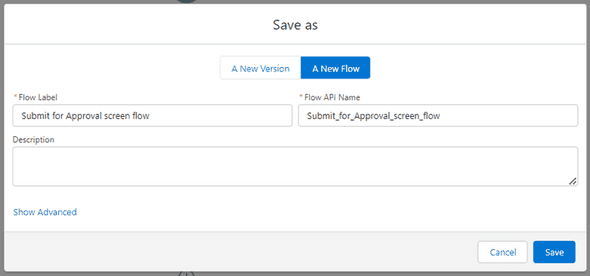
Save the flow and Name it as “Submit for Approval screen flow” → Click Save and Activate the Flow.
Create a Custom Quick Action (Object Specific)
-
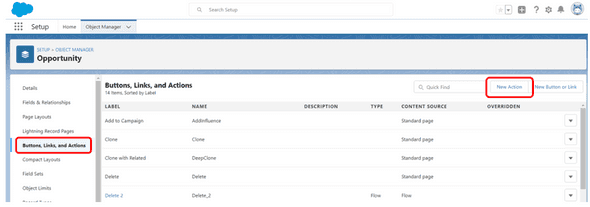
Go to Object Manager → Select Opportunity.
-
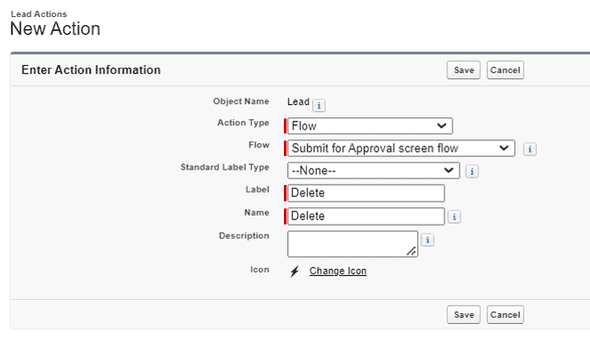
Select Buttons, Links and Actions → Click New Action.
-
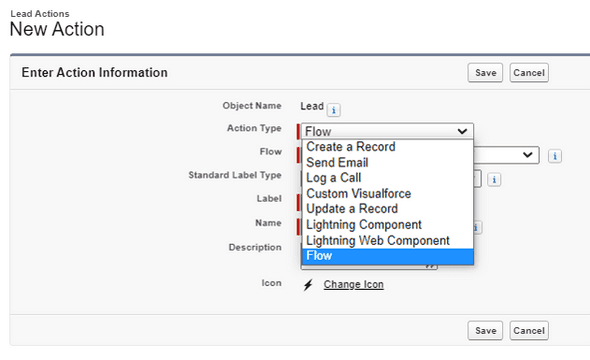
Select Action Type as Flow.
-
Select the Screen Flow “Submit for Approval screen flow” → Label the action Button as “Delete” and Click Save.
-
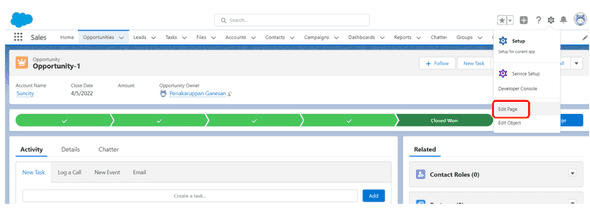
Add the created custom action button in the Opportunity Page layout. Open any opportunity record → Click Gear Icon → Click Edit Page. It will open Lightning App Builder.
-
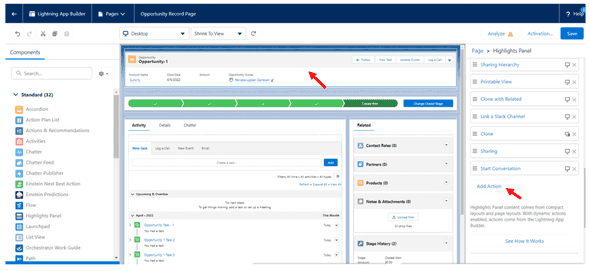
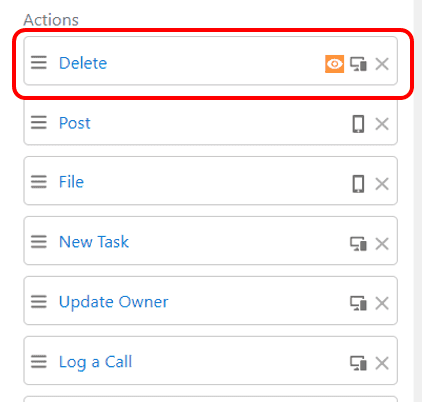
Click the highlight Panel and on the right side click “Add Action”.
-
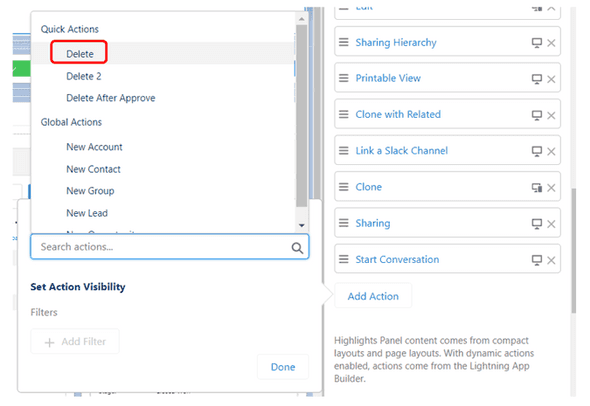
Select Delete quick action that we created.
-
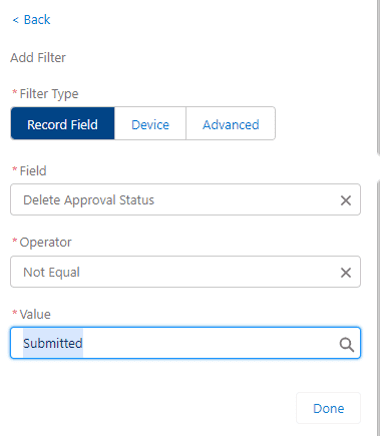
Under Set Action Visibility Add Filter Condition as Delete Approval Status Not Equal Submitted → Click Done → Click Done again.
-
Drag the Quick Action to Top.
-
Click Save and Go back to your record page.
-
Now you should see the Delete Custom Button in the record page.
Create a Record Triggered Flow
-
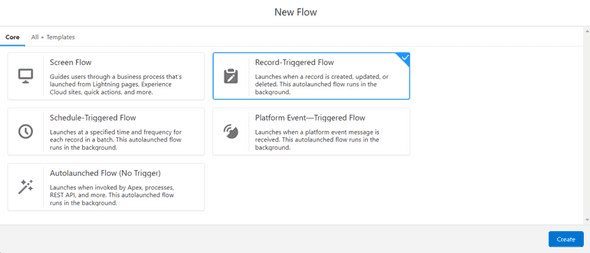
Go to Setup → In the Quick find Box search and select Flows → Click New Flow → Select Record Triggered Flow → Click Create.
-
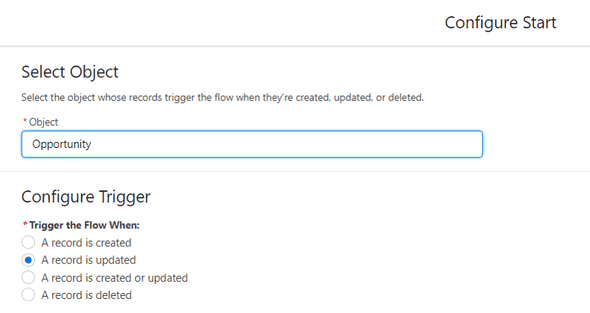
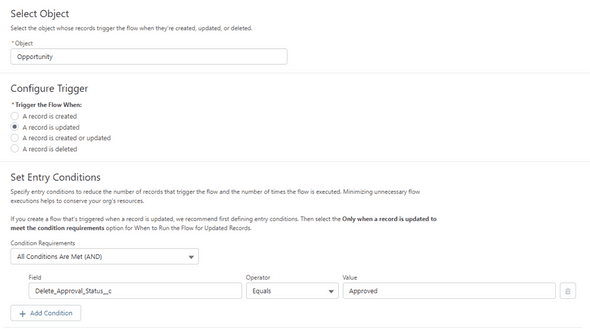
In the start element choose Opportunity as the Object and for Trigger the Flow When option choose A record is updated.
-
Under Set Entry conditions Condition Requirements → choose All conditions are met(AND) → Choose Delete Approval Status as Field, Equals as Operator and Approved as Value.
-
When to Run the Flow for Updated Records choose Only When a record is updated to meet the condition requirements → Optimize the flow for Option choose Actions and Related Records → Click Done.
-
Make sure Auto Layout is selected and Click (+) Icon.
-
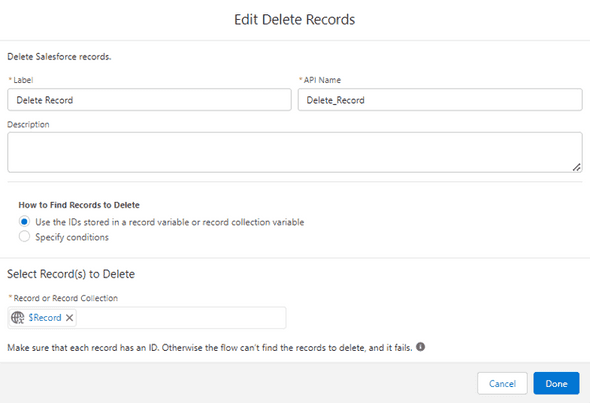
Add Delete Element and name it as “Delete Record” → Under Select Records to Delete select the recordId from the flow → Click Done.
-
Connect the start element and Delete Element → Save and Activate the flow.
Testing
-
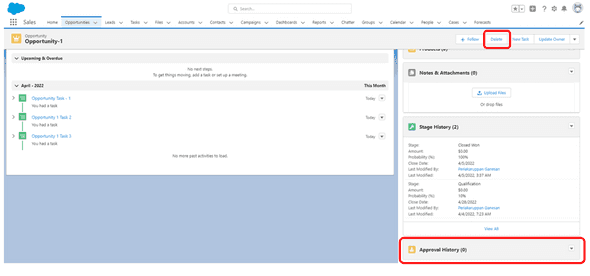
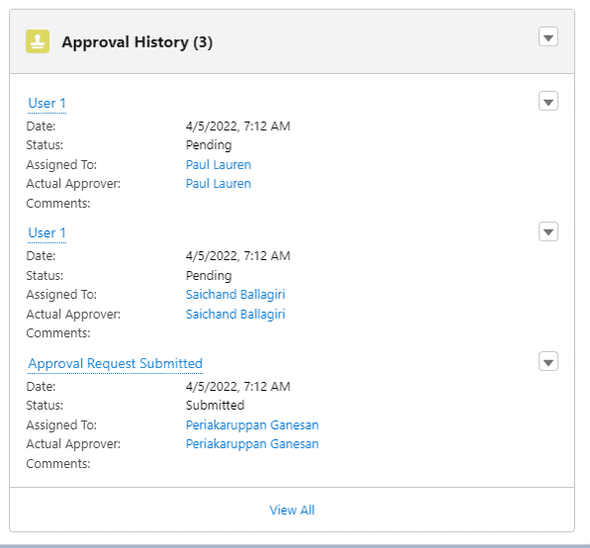
Open any Opportunity. You can see the delete button displayed at the top of the page and also you won’t see any Approval History. Click Delete Button.
-
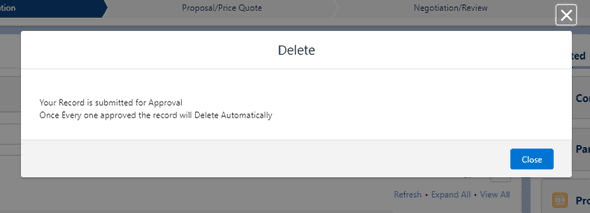
Once the delete Button is clicked. It will display a popup → Click Close.
-
The Opportunity will be submitted for Approval.
-
Once everyone approves, the Opportunity record will be deleted Automatically.
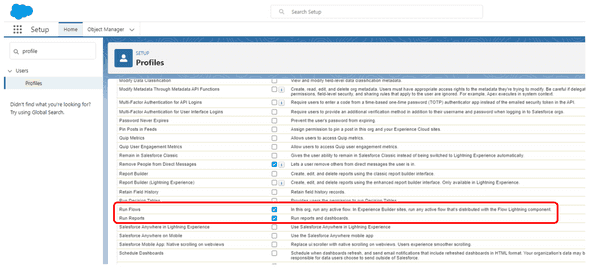
Note : If the Custom Action Button is not visible in the Page layout, Check the Run Flows permission in Profile settings.
Go to Setup → Profile → Open the Particular Profile which you want to enable the permission to → Go to System Permissions → Check the Run Flows option →Click Save.
Refresh the record Page and Now the button will be visible.
Wrapping it up
In this Blog we have covered how to enforce the approval process before deleting an opportunity record using two flows (screen flow and record triggered flow). The record is submitted for Approval from the screen flow and the field updated using field update actions is used as an entry condition for the record triggered flow.









Leave a Comment