BUSINESS CHALLENGE
Standard Salesforce apps like Sales have Multiple Navigation items like Accounts and Opportunities. We can personalize the Navigation bar of an App and add or remove items, but we cannot add or remove Custom App Pages in the Personalize your nav bar option.
We can add the Custom App Page to an apps navigation bar using the Lightning App Builder.
To explain this we create a Hello World Lightning web Component and place it on the App Page which will then be added to the navigation bar of an App.

STEPS TO ADD AN APP PAGE TO THE APPS NAVIGATION BAR
- Create a Lightning Web Component using VS Code
- Create a new App Page and add the Lightning Web Component to the Page
- Activate the Page and add it to Navigation Bar of an App
1. CREATE A LIGHTNING WEB COMPONENT USING VS CODE
1.1 CREATE A PROJECT
-
Open VS Code, Select Ctrl + Shift + P in Windows or Cmd + Shift + P in Mac to open the Command Palette.
-
Search for SFDX: Create Project and Select it.
-
Select Standard project template, enter the project name, hit enter and choose the folder in your system to save the project.


1.2 CREATE A LIGHTINING WEB COMPONENT
-
Open Command Palette, Search for SFDX: Create Lightning Web Component and Select it.
-
Enter the desired file name and hit enter.
-
For Enter desired directory, select the default option.
-
You will see a screen with the helloWorld folder and its files under lwc folder on the left.
-
Click on helloWorld.html file and paste the following code and Save the file.
<template> <lightning-card title="HelloWorld" icon-name="custom:custom14"> <div class="slds-m-around_medium"> <p>Hello, {greeting}!</p> <lightning-input label="Name" value={greeting} onchange={changeHandler}></lightning-input> </div> </lightning-card> </template> -
Click on the helloWorld.js file and paste the following code and Save the file.
import { LightningElement } from 'lwc'; export default class HelloWorld extends LightningElement { greeting = 'World'; changeHandler(event) { this.greeting = event.target.value; } } -
Click on the helloWorld.js-meta.xml and paste the following code and Save the file.
<?xml version="1.0" encoding="UTF-8"?>
<LightningComponentBundle xmlns="http://soap.sforce.com/2006/04/metadata" fqn="helloWorld">
  <apiVersion>45.0</apiVersion>
  <isExposed>true</isExposed>
  <targets>
    <target>lightning__AppPage</target>
    <target>lightning__RecordPage</target>
    <target>lightning__HomePage</target>
  </targets>
</LightningComponentBundle>


1.3 CONNECT TO THE ORG AND DEPLOY THE LIGHTNING WEB COMPONENT
-
Open Command Palette and Search for SFDX: Authorize an Org and Select it.
-
Choose your Org type and if it is Custom, paste your Orgs login URL in the next step.
-
For Org alias, hit enter for a default alias or type a new alias.
-
On hitting enter you will be taken to the Salesforce Login Page in a browser.
-
Enter the Credentials and Login.
-
Head back to VSCode and you will see the notification SFDX: Authorize an Org successfully ran.
-
Now right click on the folder helloworld folder which is on the left pane and click SFDX: Deploy Source to Org.
-
You should see the notification SFDX: Deploy source to Org successfully ran shortly.


2. CREATE A NEW APP PAGE AND ADD THE LIGHTNING WEB COMPONENT TO THAT PAGE
-
From Setup, Search for Lightning App builder and Select it.
-
Click on New.
-
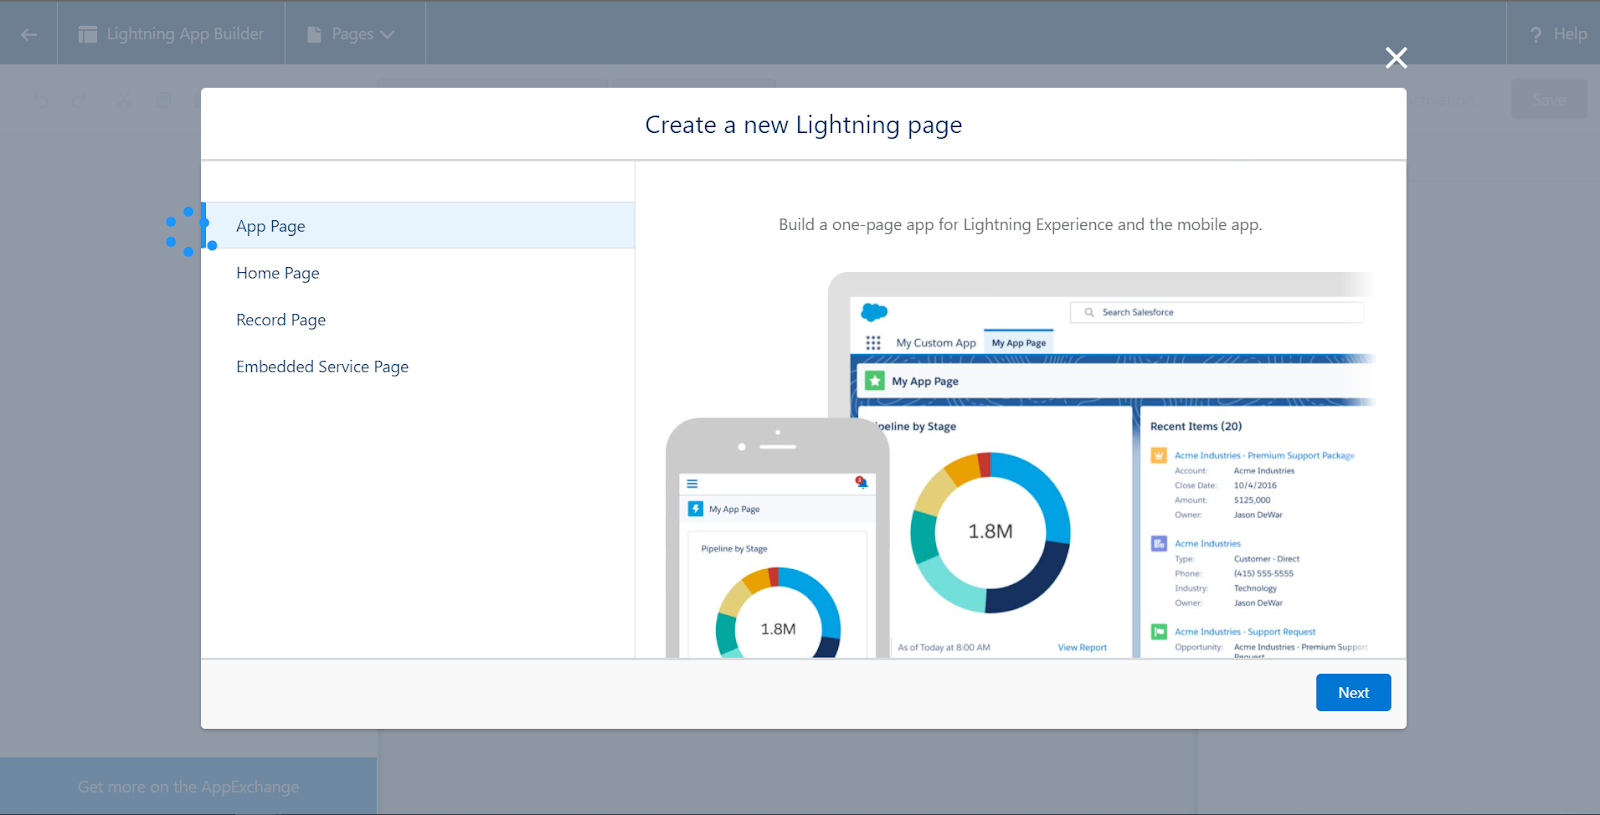
Select App page and click Next.
-
Label the New Lightning Page. The Label entered here will be the name of the New Tab.
-
You will see several options to choose for the page appearance, Here we will choose One Region because we are adding only one component.
-
Click Finish.
-
On the left pane where you see a list of Components scroll down till you see Custom Components. Now Drag and Drop the helloWorld Component we created, onto the page.
NOTE
You can add either an Aura Component or a Lightning Web Component here.
-
Now Click Save on the top right corner.
-
You should see a popup with the message Page Saved.


3. ACTIVATE THE PAGE AND ADD IT TO NAVIGATION BAR OF AN APP
-
Now Activate this page to make it Visible to Users.
-
On Clicking Activate, You will see more Activation Settings.
-
Under Page Settings Tab, You can choose to Activate the Page for All Users or System Administrators Only.
-
You can also change the icon of your lightning app page by clicking Change… beside the icon.
-
Next, Click on the Lightning Experience Tab.
-
On the Left Pane, you will see all the apps in your Org.
-
Select an app to which you would like to add this page as a tab on the Navigation bar.
-
On the right pane, Click on the button Add page to app to add the page.
-
On Adding the Page, It will display all the Navigation items available on that App.
-
You can see your App Page in the Available items and rearrange your Page in the order you require.
NOTE
If you accidentally added the page to another app, you can just remove the app page from the app by clicking on the Remove page at the top of the right pane.
-
Click Save at the right bottom of the popup to finish activation.
-
Now head back to the App you added the Page to and Verify if it’s visible.
-
If you want to Remove the page after activation, Go to Setup → Tabs
-
Under the Lightning Page Tabs section, you can see the Created Tabs.
-
Under Action, Click Del to Delete the Page from the App.


WRAPPING IT UP
In this Blog, we have explained how to Embed a Lightning Web Component into an App page using Lightning App builder and add it as a Tab to the Navigation bar of an App.
Leave a Comment