BUSINESS REQUIREMENT
When an opportunity is CLOSED (Won or Lost), it is a good idea to keep all the stakeholders informed. It would also be beneficial to do an analysis and record lessons learnt (particularly for lost Opportunities). This information could then be used to report and glean business insights to course correct.
While closing an Opportunity additional details (like lessons learnt) are entered and then an email is sent with the details of the opportunity to a public group/ Opportunity Team Members/ Opportunity Owner via Email.
We can achieve this by using 2 flows. The first one is a screen flow, Where you will add the Fields to get additional information on how the opportunity was closed and whether or not to send an email notification to the team. (For Small opportunities, the Owner has the ability to decide whether to skip the process).
The second part of the flow is a record triggered flow where we will pull in “Get Records” Elements and loop through team members, Group Ids and user Ids to get email Ids.
- Create a Custom field in Opportunity Object, From Setup → Object Manager → Opportunity → Create a Custom Field with checkbox data type and Label it as Send Close Communication.
PART 1: CREATING A SCREEN FLOW
From Setup → Flows → New Flow → Screen Flow → Click Next → Select Auto-Layout.
Creating Screen Flow involves 5 steps:
- Creating a Resource for Opportunity ID
- Add a Screen Element for input
- Add an Update Record Element
- Add a Screen Element to display the end screen
- Add a Quick Action to trigger Screen Flow
1. CREATING A RESOURCE FOR OPPORTUNITY ID
-
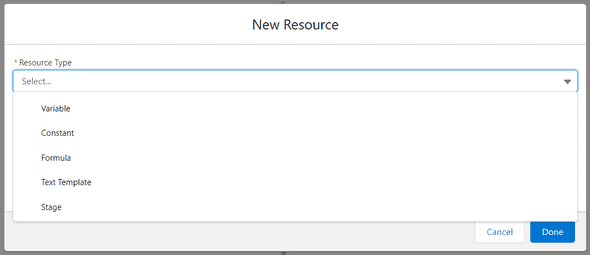
In the Manager Tab of the left pane, click on New Resource.
-
Select the Variable as Resource Type from the picklist.
-
Give the recordId as API Name
-
Select Text as Data Type which will present the “Available Outside the Flow” section.
-
Check the Available for Input checkbox
-
Click the Done button.
2. ADD A SCREEN ELEMENT FOR INPUT
-
Add a Screen Element to the Flow and Label it as Enter Comment.
-
Drag and Drop a Display Text Component on the Screen.
-
Give the API Name as Record_Id and enter the Text to be displayed.
-
Here in the Text to display we use the {!recordId} Resource as it collects the record Id from the Screen.
-
Set the Component visibility as required.
Note: The recordId Variable is pulled here on the screen only to pass the id through Flow and not to display the Opportunity Id.
-
Drag a Text Field Component onto the Screen and place it below the Display Text Component as shown in the image.
-
Label the Component as Comment and make it a required entry by checking the Require checkbox.
-
Additionally you can choose to Set Component Visibility, Validate Input and Provide Help.
-
Drag a Checkbox Component onto the Screen and place it below the Text Component.
-
Label the Component as Send Close Communication. Set the Default Value to {!$GlobalConstant.True} right side of the pane.
-
On the screen Properties, Click on Configure the footer and Select Hide Previous and Hide Pause radio buttons.
-
Once the footer is set, click Done.
3. ADD AN UPDATE RECORD ELEMENT
Done on above step takes to the flow screen
-
Click on the ‘+’ sign and add an Update Records Element.
-
Label the Element as Update Comment Field and Choose Specify conditions to identify records, and set Fields individually.
-
Select the Object as Opportunity.
-
Filter Opportunity Records using the Id Field of the Object.
-
Use the recordId Resource created above as the Value here.
-
Now set the Comment and Send Close Communication Fields with the Values from the Enter Comment Screen.
-
Assign the Values, & click Done.
4. ADD A SCREEN ELEMENT TO DISPLAY END SCREEN
-
Add a Screen Element after the Update Comments Element.
-
Give the Screen Element an API Name as End Screen.
-
Drag a Display Text Component to the Screen and give it an API Name of Comment_Updated. Add the Text to be displayed and format it as required.
-
Configure Header and Footer setting to Hide Header and display Footer with a Finish button on it.
-
Click Done.
-
Click Save As and Label the Flow as ‘Comment Screen Flow’.
5. ADD A QUICK ACTION TO TRIGGER SCREEN FLOW
-
Setup → Object Manager → Opportunity.
-
Select the Button, Actions and Links Option. Now add a New Action and Label it as Send Close Communication.
-
Select the Action Type as Flow, select the Screen Flow in the next option.
-
Label the action as Send Close Communication and Save it.
-
In the Opportunity page layout, from Mobile & Lightning Actions at the top select Send Close Communication and drag it to the Salesforce Mobile & Lightning Experience Actions Section and Save it.
Note: Additionally In the Edit page of an Opportunity, we set the visibility of the Action button to display only when the stage is closed.
PART 2: CREATING A COMMENT FLOW
Creating a Comment Flow requires the following steps:
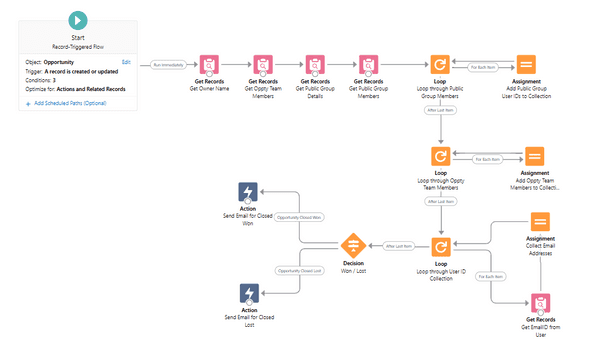
- Add Get Records to get Fields from various Objects.
- Loop through Public Group Members Collection & assign Ids to a Collection.
- Loop through Opportunity Team Members and add it to a Collection.
- Loop through User Id Collection, Get Email Addresses and add it to a Collection.
- Add a Decision Element to decide Closed Won or Lost.
- Add Action for Closed Won and Closed Lost.
- Save the Flow.
SNAPSHOT OF COMMENT FLOW
1. ADD GET RECORDS TO GET FIELDS FROM VARIOUS OBJECTS
GET OPPORTUNITY RECORDS FOR CLOSED WON/LOST STAGE
-
Setup → Flows → New Flow → Record Triggered Flow.
-
In the Start Element, Select the Object as Opportunity.
-
In the Configure Trigger section, Select A record is created or updated.
-
Set Entry Conditions as below:
-
Under When to Run the Flow for Updated Records, Select Every time a record is updated and meets the condition requirements.
-
Set this Option if available: Optimize the Flow for Actions and Related records.
-
Click Done.
GET OWNER DETAILS FROM USER OBJECT
-
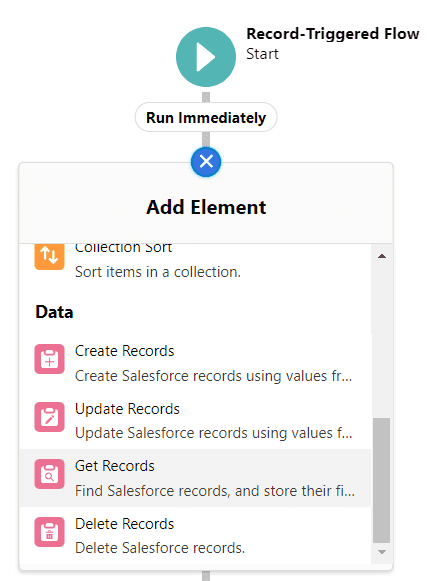
Add a Get Records Element after the Start.
-
Enter the API Name of the Element as Get Owner Name.
-
Select the User as Object and Filter the Records where ID equals the Opportunity’s OwnerId.
-
Under Sort User Records, Select Ascending order as Sort Order and Id as Sort By.
-
Under How Many Records to Store, Choose to store Only the first record.
-
Under How to Store Record Data, Select Choose fields and let Salesforce do the rest.
-
ID is selected by default, additionally select Name Field to be stored in the Variable.
-
Click Done.
GET OPPORTUNITY TEAM MEMBER DETAILS FROM OPPORTUNITY TEAM MEMBER OBJECT
-
Add a Get Records Element and Label it as Get Oppty Team Members.
-
Select Opportunity Team Member as the Object.
-
Filter Records by OpportunityId and the equated Value should be Opportunity Id.
Note: The Field on the left is the Opportunity ID of the Opportunity Team Member Object and the Value on right is the ID of Opportunity Object.
-
Under Sort Opportunity Team Members Records, Select Ascending order as Sort Order and UserId as Sort By.
-
Under How Many Records to Store, Choose to store All Records.
-
Under How to Store Record data, Select Choose Fields and let salesforce do the rest.
-
ID is selected by default, additionally Select UserId Field to be stored in the Variable.
-
Click Done.
GET THE ID OF PUBLIC GROUP FROM GROUP OBJECT
-
Add a Get Records Element and Label it Get Public Group Details.
-
Select the Group as Object. Before filtering Group Records, make sure you have a Public Group with Members in it.
-
Next, Filter Group Records by Name equals “your public group Name”.
-
Under Sort Group Records, Select Ascending order as Sort Order and ID as Sort By.
-
Under How Many Records to Store, Choose to store Only the first record.
-
Under How to Store Record Data, Select Automatically store all fields.
-
Click Done.
GET MEMBERS OF PUBLIC GROUP FROM GROUP MEMBERS OBJECT
-
Add a Get Records Element and Label it as Get Public Group Members.
-
Select Group Member as the Object and Filter Group Members Records by GroupId.
-
Equate the GroupId to the Id from the Public Group Id Get Records Element.
-
Under Sort Group Member Records, Select Ascending order as Sort Order and UserOrGroupId as Sort By.
-
Under How Many Records to Store, Choose to Store All Records.
-
Under How to Store Record Data, Select Choose fields and let Salesforce do the rest.
-
ID is selected by default, additionally Select UserOrGroupId Fields to Store in Variable.
-
Click Done.
2. LOOP THROUGH PUBLIC GROUP MEMBERS COLLECTION & ASSIGN IDS TO A COLLECTION
LOOP THROUGH PUBLIC GROUP MEMBERS COLLECTION
-
Click on "+" and now add a Loop Element.
-
Label the Loop as Assign Public Member to Team Member.
-
Select Get Public Group Members as Collection Variable.
-
Specify the direction as First item to last item, and Click Done.
CREATE A RESOURCE FOR USER ID COLLECTION
-
In the Manager Tab of the left pane, click on New Resource.
-
Select the Variable as Resource Type from the picklist.
-
Give User_ID_Collection_Variable as API Name.
-
Select the Text as Data Type.
-
To make it a Collection, Check the Allow multiple Values checkbox.
-
Click Done.
ASSIGNING USER ID TO TEAM MEMBERS
-
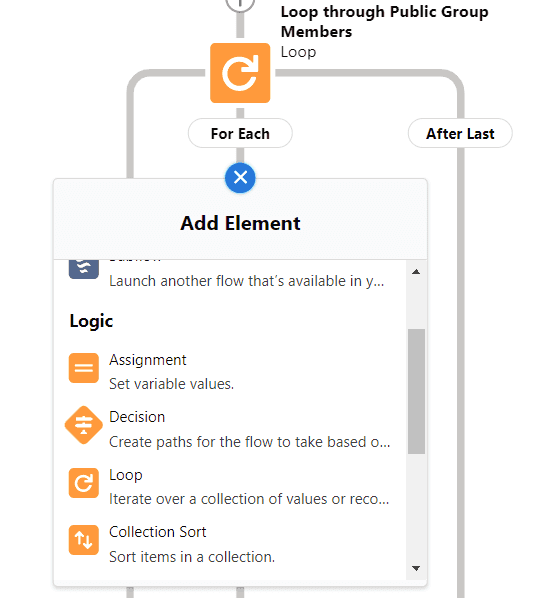
Inside the Loop, Add an Assignment Element.
-
Label the Element as Add Public Group User Ids to Collection.
-
Select User_ID_Collection_Variable as the Variable.
-
Select Add as Operator and for the Value Select Current Item from Loop Assign_Public_Member_to_Team_Member and Select UserOrGroupId from list.
-
Click Done.
3. LOOP THROUGH OPPORTUNITY TEAM MEMBERS & ADD IT TO COLLECTION
LOOP THROUGH OPPORTUNITY TEAM MEMBERS
-
Add a Loop element to the Flow.
-
Label it as Loop through Oppty Team Member.
-
Select Get Oppty Team Members as Collection Variable.
-
Specify the direction as First item to last item, and Click Done.
ADD OPPORTUNITY TEAM MEMBERS TO THE COLLECTION
-
Inside the Loop, Add an Assignment Element.
-
Label the Element as Add Oppty Team Members to Collection.
-
Select the User_ID_Collection_Variable as Variable.
-
Select Add as the Operator.
-
Populate the Value with User Id from Current Item from the loop Loop through Oppty Team Members.
-
Click Done.
4. LOOP THROUGH USER ID COLLECTION, GET EMAIL ADDRESSES AND ADD TO COLLECTION
LOOP THROUGH USER ID COLLECTION
-
Add a Loop to the Flow.
-
Label it as Loop through User ID Collection.
-
Select User_ID_Collection_Variable as Collection Variable.
-
Specify the direction as First item to last item and Click Done.
GET EMAIL OF USERS FROM USER OBJECT
-
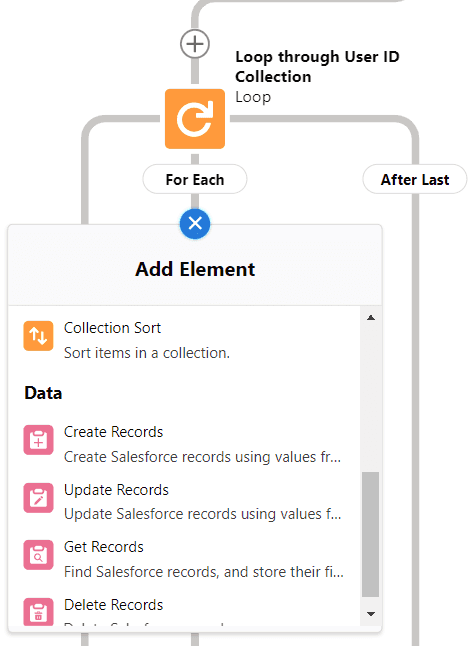
Inside the Loop, Add a Get Records Element.
-
Label the Element as Get EmailID from User.
-
Select the User as Object and Filter User Records by ID.
-
Match the Field ID with Current Item from the loop Loop_through_Oppty.
-
Under Sort User Records, Select Ascending order as Sort Order and Id as Sort By.
-
Under How Many Records to Store, Choose to Store Only the first record.
-
Under How to Store Record data, Select Choose Fields and let salesforce do the rest.
-
ID is selected by default, additionally Select Email Fields to Store in a Variable.
-
Click Done.
CREATE A COLLECTION FOR EMAIL ADDRESSES
-
In the Manager Tab of the left pane, click on New Resource.
-
Select the Variable as Resource Type from the picklist.
-
Give Email_Addresses as API Name.
-
Select Text as the Data Type.
-
To make it a Collection, Check the Allow multiple Values checkbox.
-
Click Done.
ADD THE EMAIL ADDRESSES TO COLLECTION
-
Inside the Loop, Add an Assignment Element.
-
Label the Element as Collect Email Addresses.
-
Select the Email_Addresses as the Variable and select Add as the Operator.
-
Set the Email from the EmailID_from_User as Value, Click Done.
5. ADD A DECISION ELEMENT TO DECIDE CLOSED WON/LOST
-
Exit the Loop, Add a Decision Element.
-
Label the Decision Element as Won/Lost.
-
For the First Outcome, Label the Outcome as Opportunity Closed Won.
-
Under Condition Requirements to Execute Outcome, Add a Condition to check if the Record Stage Equals Closed Won.
-
Set the Outcome to Execute If the condition requirements are met.
-
Rename the Default Outcome as Opportunity Closed Lost.
6. ADD ACTION FOR EACH DECISION PATH
ACTION WHEN STAGE IS CLOSED WON
-
For First Outcome of Decision, Add an Action.
-
Select the Action as Send Email.
-
Label the Action as Send Email for Closed Won.
-
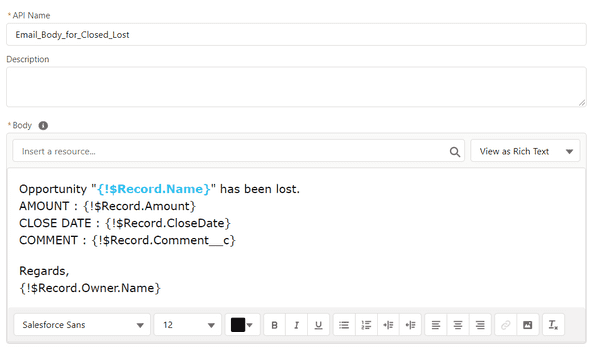
For the Body of the Email, you can create a New Resource with the Text Template as Resource Type.
-
In the Text template, you can pull the Fields that are required and also format it.
-
For the Subject of the Email, you can create Another Resource or just use the Text Opportunity Won.
-
In the Email Addresses (Collection) Field, Select the Email_Addresses Collection Variable.
-
Include the Rich-Text-Formatted Body and give a Value of True.
-
Include Sender Addresses and Select the Record Owner’s Email for the Value.
-
Click Done.
ACTION WHEN STAGE IS CLOSED LOST
7. SAVE THE FLOW
-
Once all the Elements have been added to the Flow, Save the Flow.
-
Label the Flow as Comment triggered Flow and Activate the Flow.
WORKING
- When the Send Close Communication Action Button is clicked we get a pop up.
- Once the comment is entered and the Next button is clicked, the comment gets updated and also the Emails are sent.
SNAPSHOT OF EMAIL RECEIVED
WRAPPING IT UP
In this blog we created a screen Flow to get comments after closing an Opportunity and a record triggered Flow to send emails to Opportunity Team Members, Public Group Members and Owners with Opportunity details when the stage is Closed Won or Lost.













Leave a Comment